> ## Documentation Index
> Fetch the complete documentation index at: https://docs.zappl.co/llms.txt
> Use this file to discover all available pages before exploring further.
# Accounts
> Manage access to your dedicated Zappl customer portal.
The first admin account in your online Zappl portal is created during the initial sign-up process.
This account becomes the super admin and cannot be deleted, so it's best to use a dedicated mailbox for this purpose — for example, [zappl@acme.corp](mailto:zappl@acme.corp) — rather than an individual's email address.
When you sign up, an email invitation is sent to the provided address. After accepting this invite, you'll be prompted to create a password and set up two-factor authentication. Once logged in, you can create additional admin and standard accounts using the steps outlined below.
#### Creating User Accounts
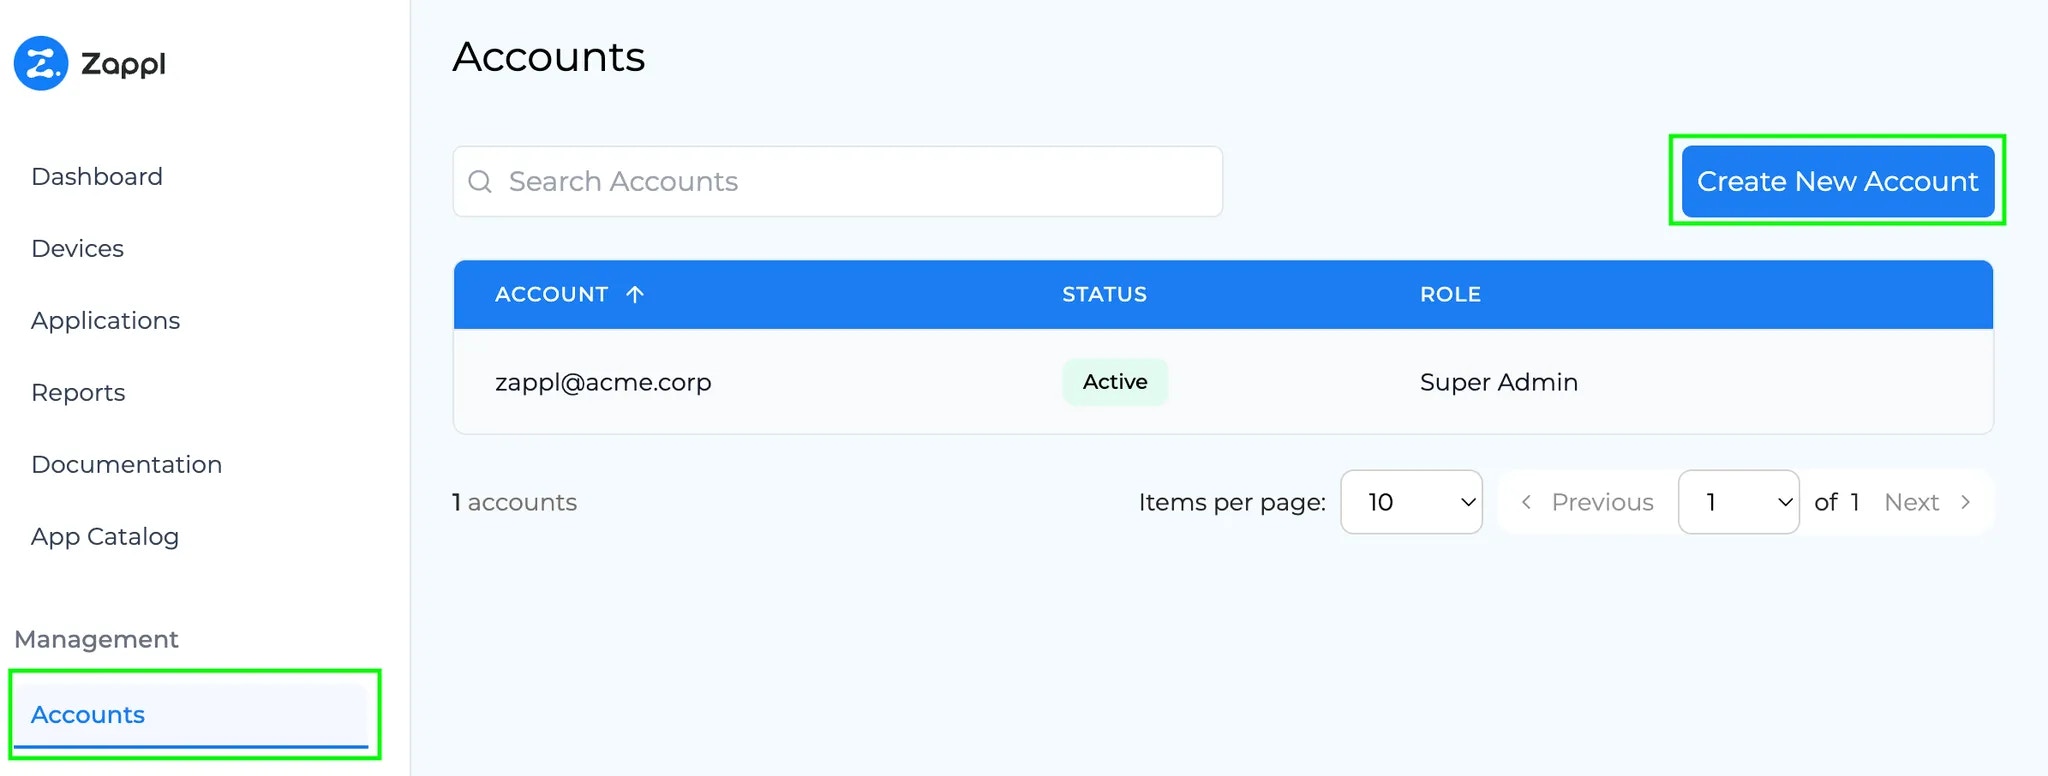
On the navigation bar to the left, under **Management**, select **Accounts**, then select **Create New Account**.
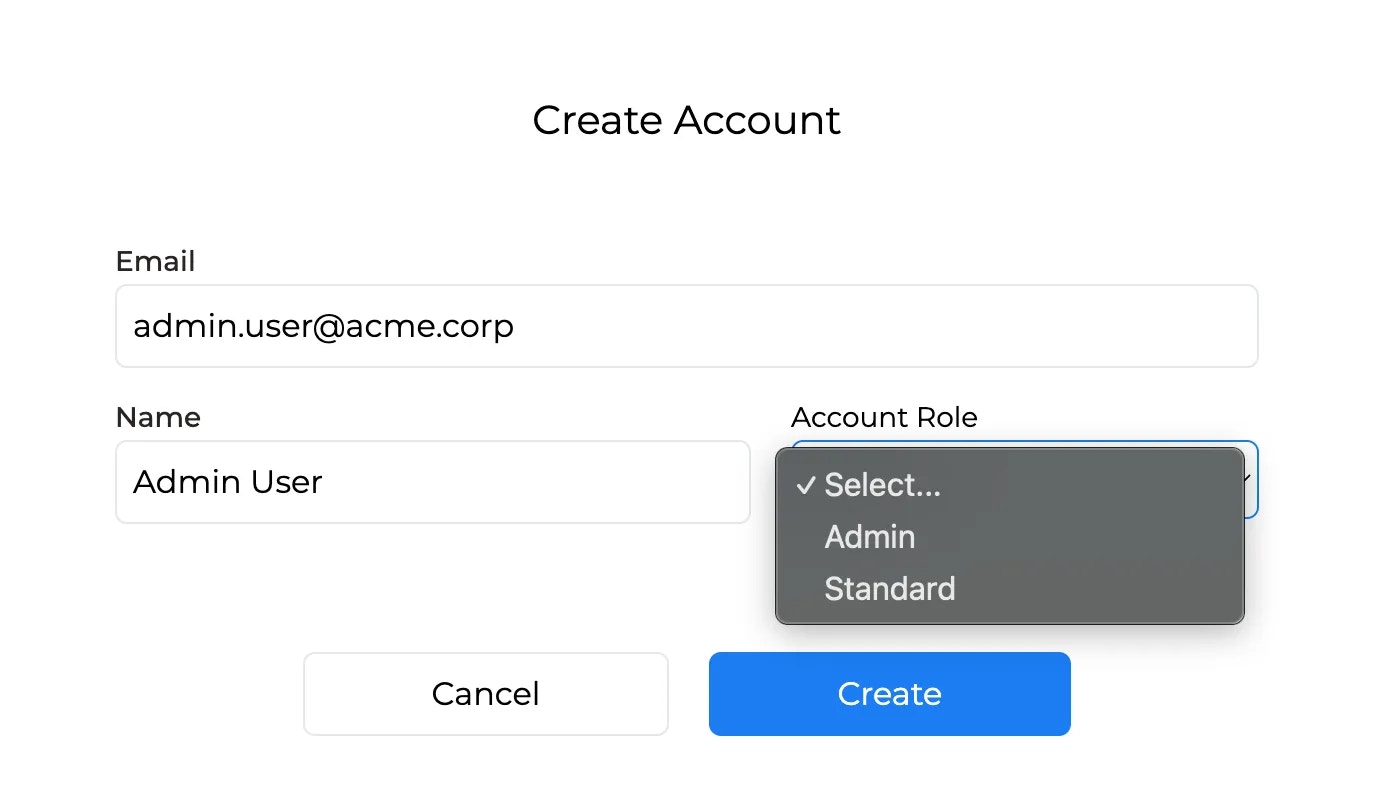
 In the `Create Account` dialog, enter the email address, name, and select an account role from the dropdown. Once done, click **Create**.
The **Admin** role provides full access to manage user accounts and reports.
In the `Create Account` dialog, enter the email address, name, and select an account role from the dropdown. Once done, click **Create**.
The **Admin** role provides full access to manage user accounts and reports.
The **Standard** role is read-only, allowing users to log in and view dashboards, but not manage users or reports.
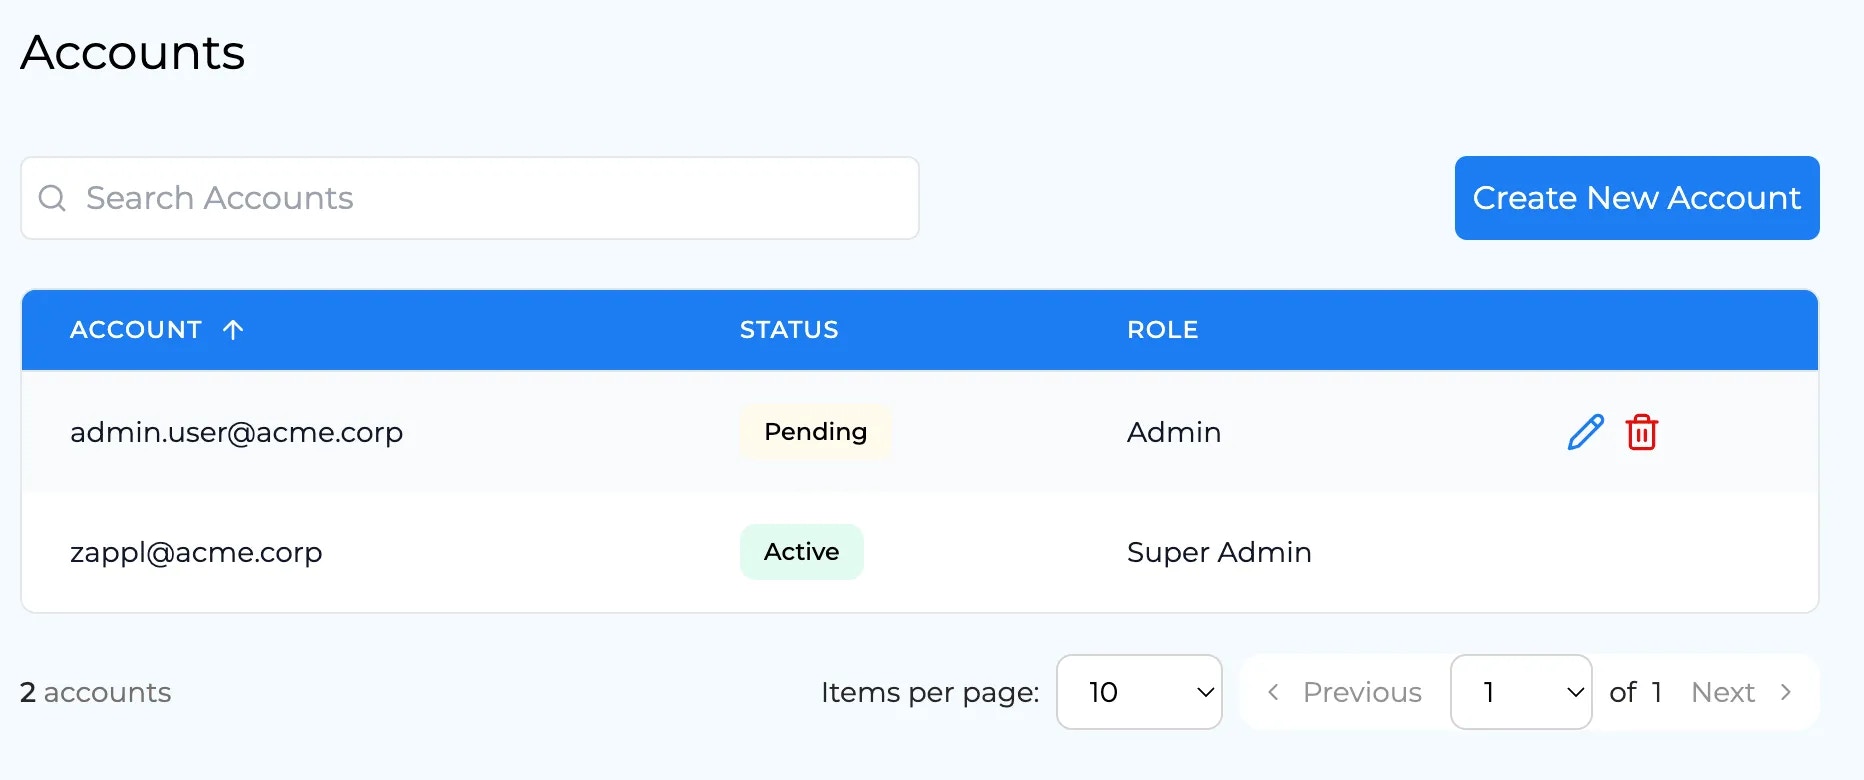
 The new account will now be listed under the main accounts section and will have a `Pending` status until the user accepts the email invitation and successfully sets up their password and two-factor authentication.
To modify the email address for the user after creation, click the pencil icon, change the email address and click save. A new invite will be sent to the new email address.
The new account will now be listed under the main accounts section and will have a `Pending` status until the user accepts the email invitation and successfully sets up their password and two-factor authentication.
To modify the email address for the user after creation, click the pencil icon, change the email address and click save. A new invite will be sent to the new email address.
If the invite expires, simply click the bin icon on the user item to remove the user, and repeat the above account creation steps to send a new invite.