> ## Documentation Index
> Fetch the complete documentation index at: https://docs.zappl.co/llms.txt
> Use this file to discover all available pages before exploring further.
# Jamf Pro
> This guide provides step-by-step instructions on how to use Jamf Pro to configure and deploy Zappl in your environment.
> For a successful Zappl deployment with Jamf Pro, please follow the steps in the order outlined below. It is important that all configuration profiles are installed prior to the Zappl installer being deployed.
## Zappl Category
This category is not essential for deployment, but it can help keep your Jamf Pro environment neat and organised.
We’d recommend creating a new `Zappl` category for housing the necessary Configuration Profiles, Policies, Scripts etc.
**To add the category:**
Navigate to *Jamf Pro > Settings > Categories* and click **New**.
Type in **Zappl** for the Category name.
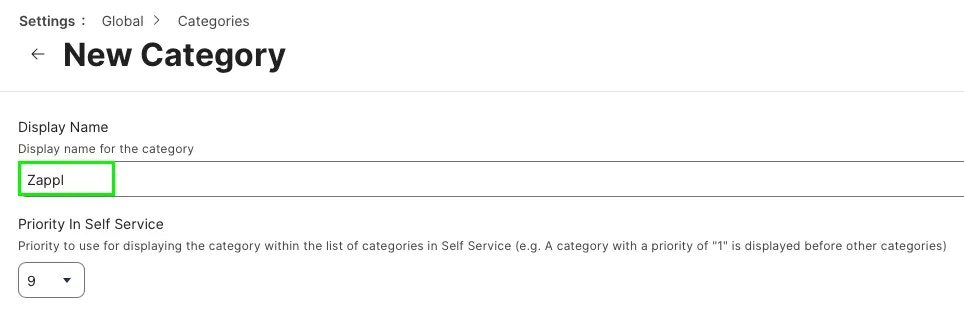 **Save** the Category.
The Zappl category is now ready to use throughout the Zappl deployment in Jamf Pro.
**Save** the Category.
The Zappl category is now ready to use throughout the Zappl deployment in Jamf Pro.
## Configuration Profiles
#### Adding the JSON Schema
Open/download our [JSON file](https://latestinstaller.zappl.co/Resources/JSON%20Schema/Zappl%20Preferences.json?v=3.0.0).
In Jamf Pro, navigate to *Computers > Configuration Profiles* and click **New**.
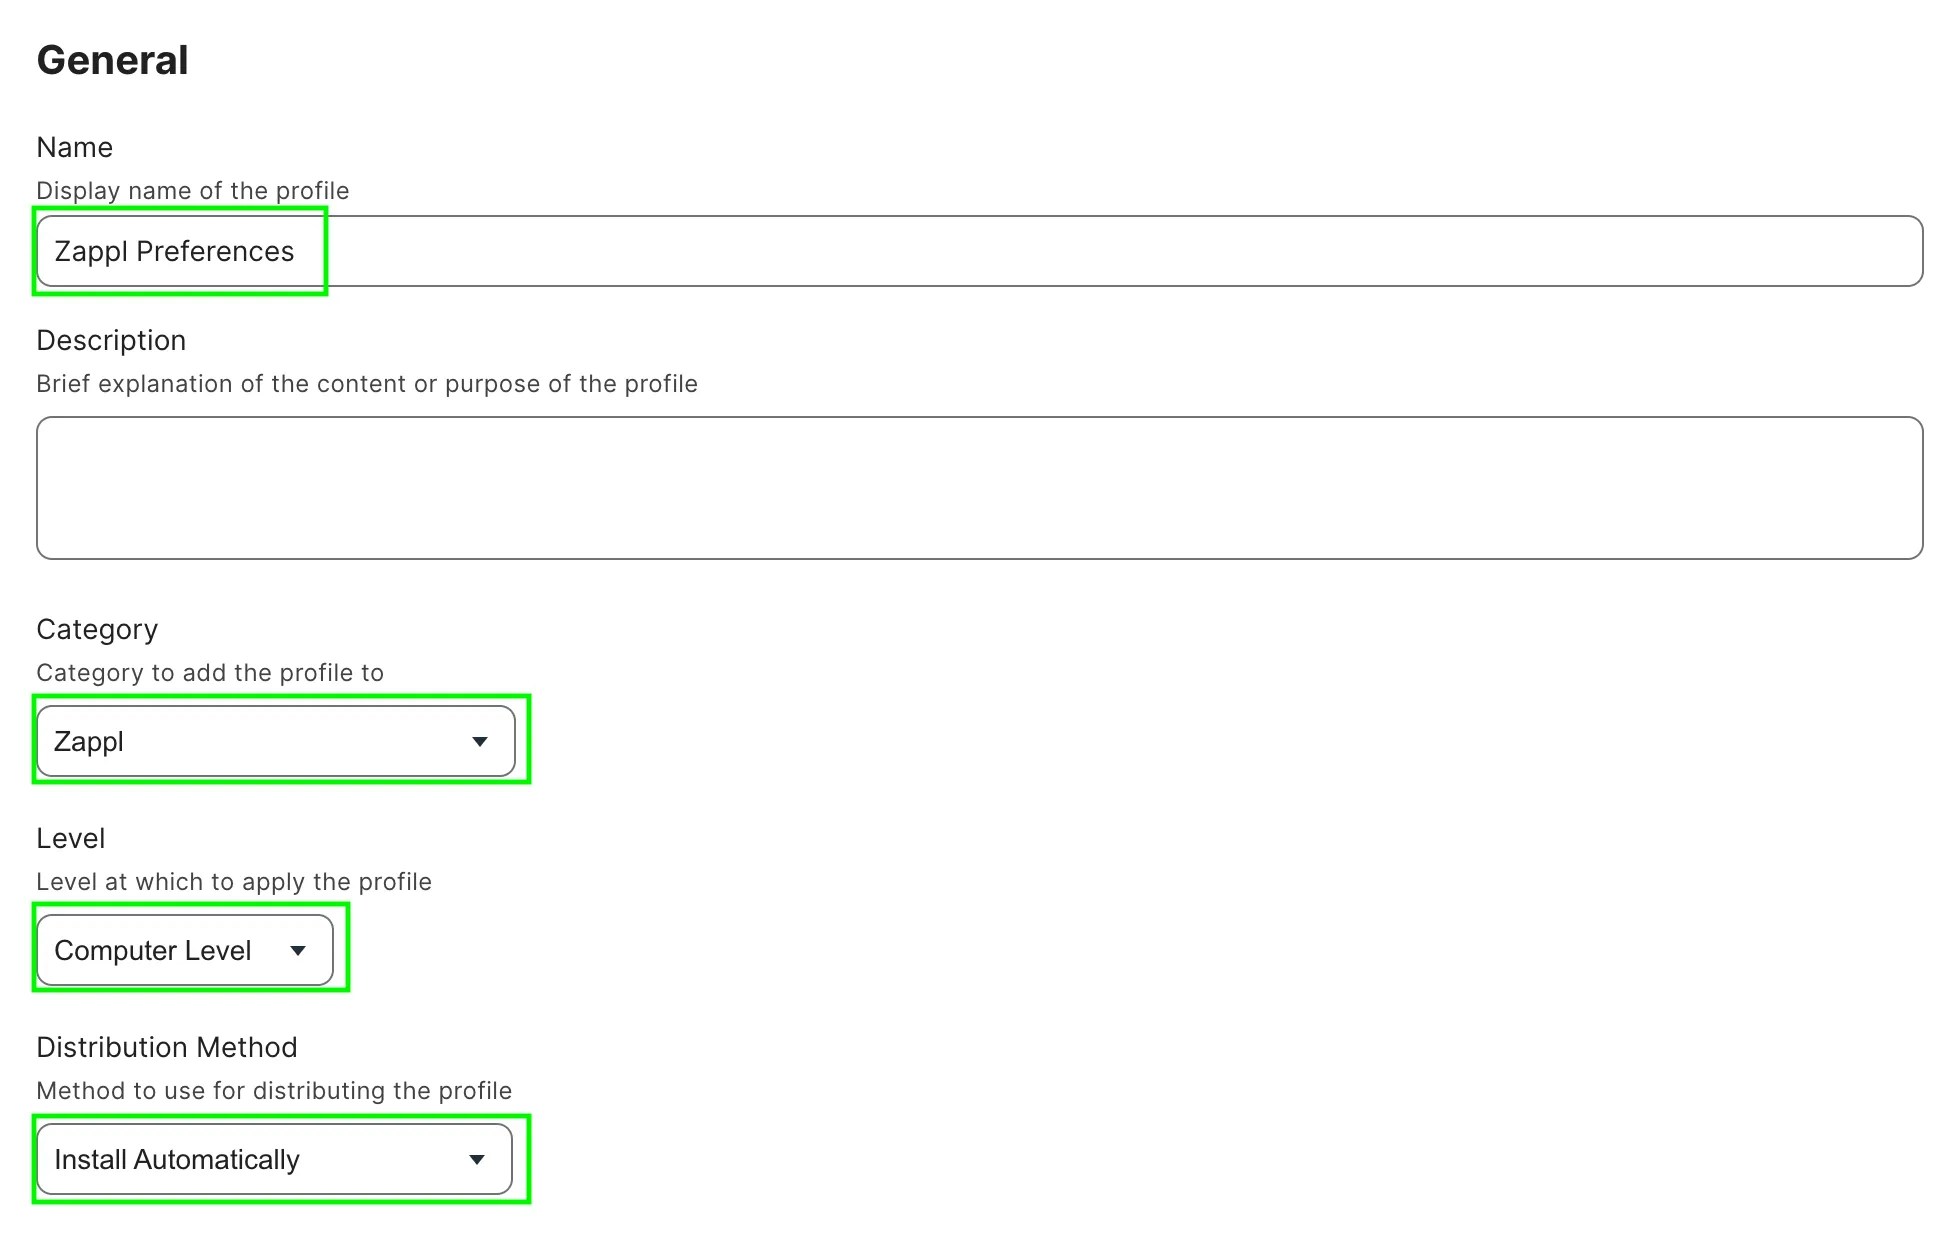
In the general payload, give the new profile a name, assign it to a category, set the level as **Computer Level** and the distribution method as **Install Automatically**.
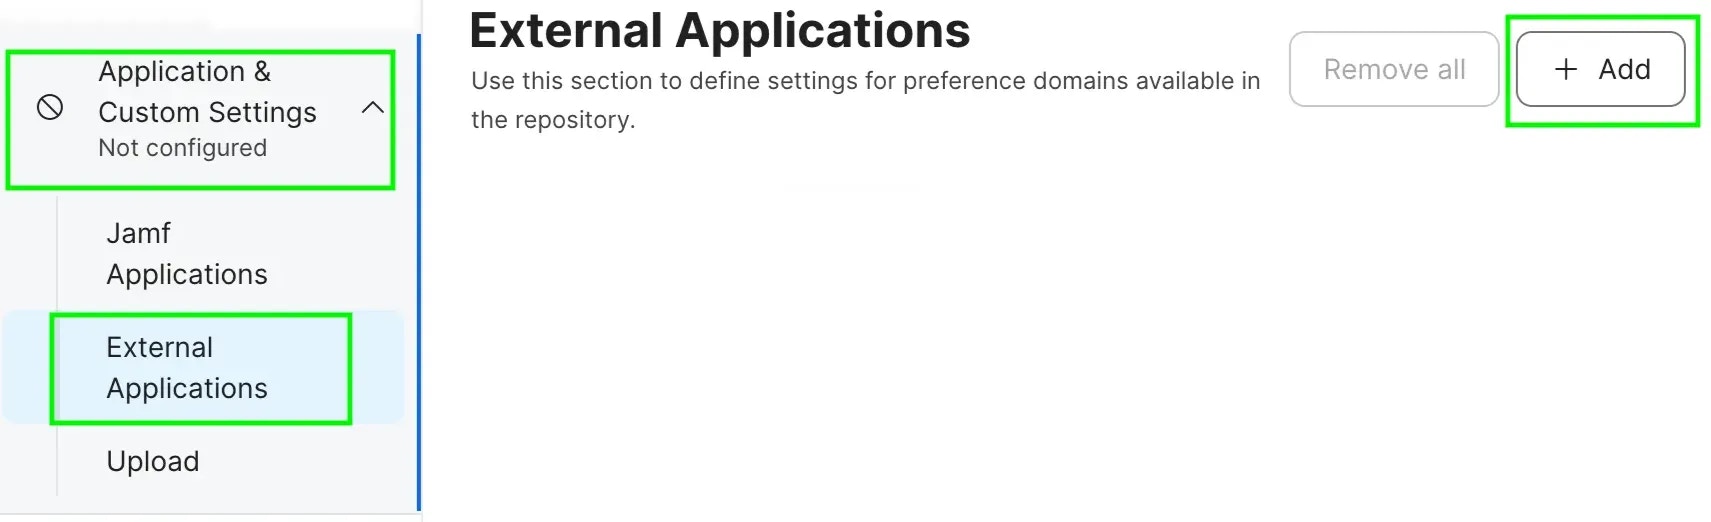
 Under the payload options, locate the **Application & Custom Settings** payload, select **External Applications** and select **Add**.
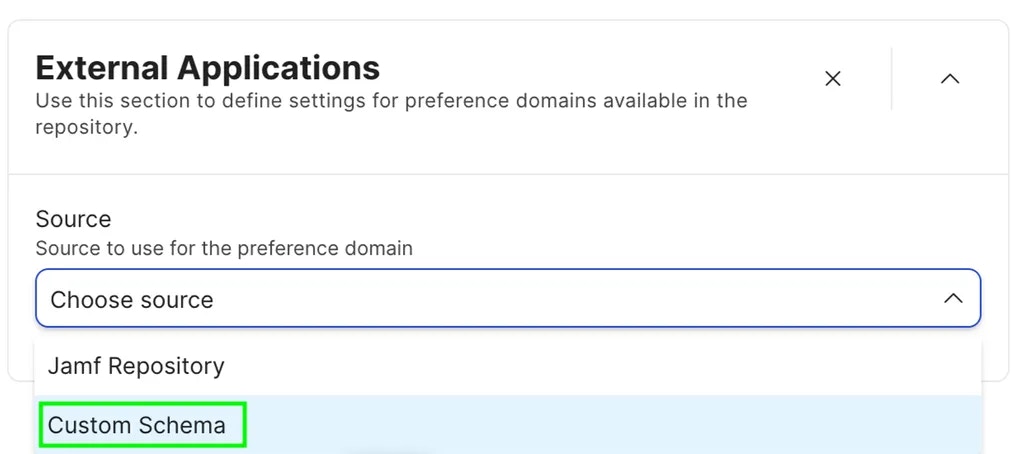
 Under the Source dropdown, select **Custom Schema**.
 Set the preference domain as `com.dare.zappl.preferences` and click **Add Schema**.
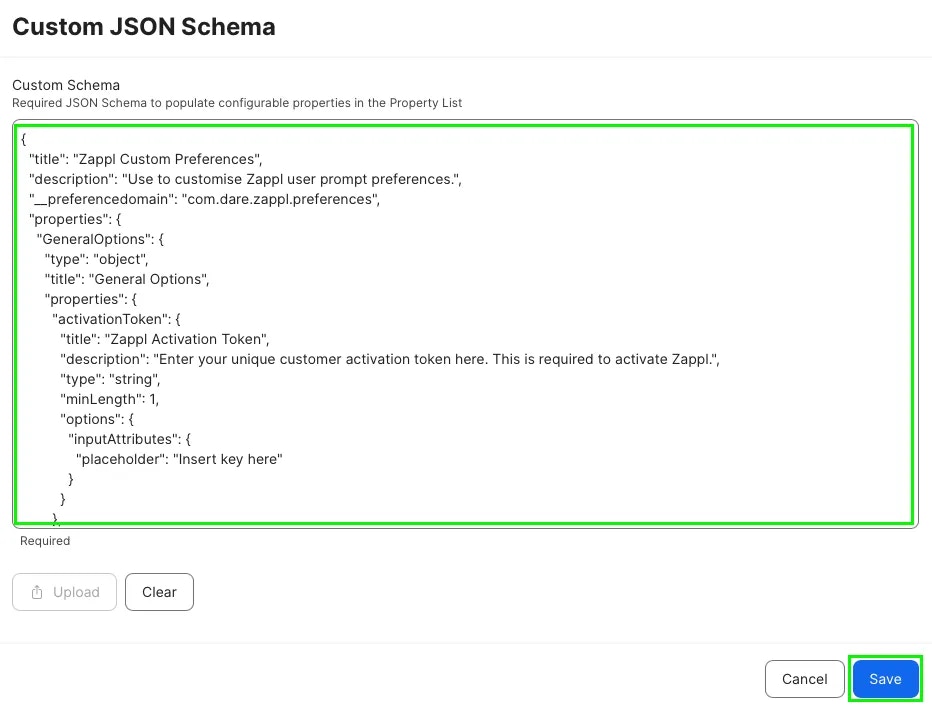
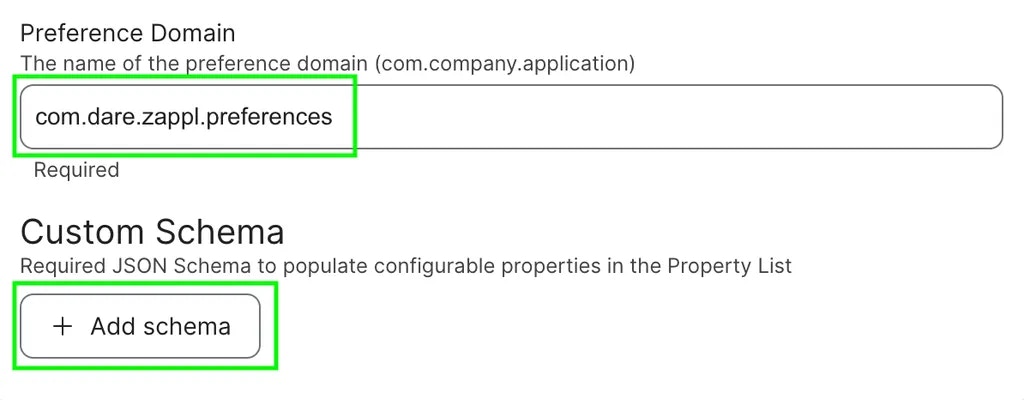 Copy the entire JSON Schema that we opened in an earlier step, Paste it into the text area and click **Save**.
 ### Customise Preferences
Configure your desired Zappl behaviour and user experience using the keys outlined in our [Preferences page](/customise/preferences).
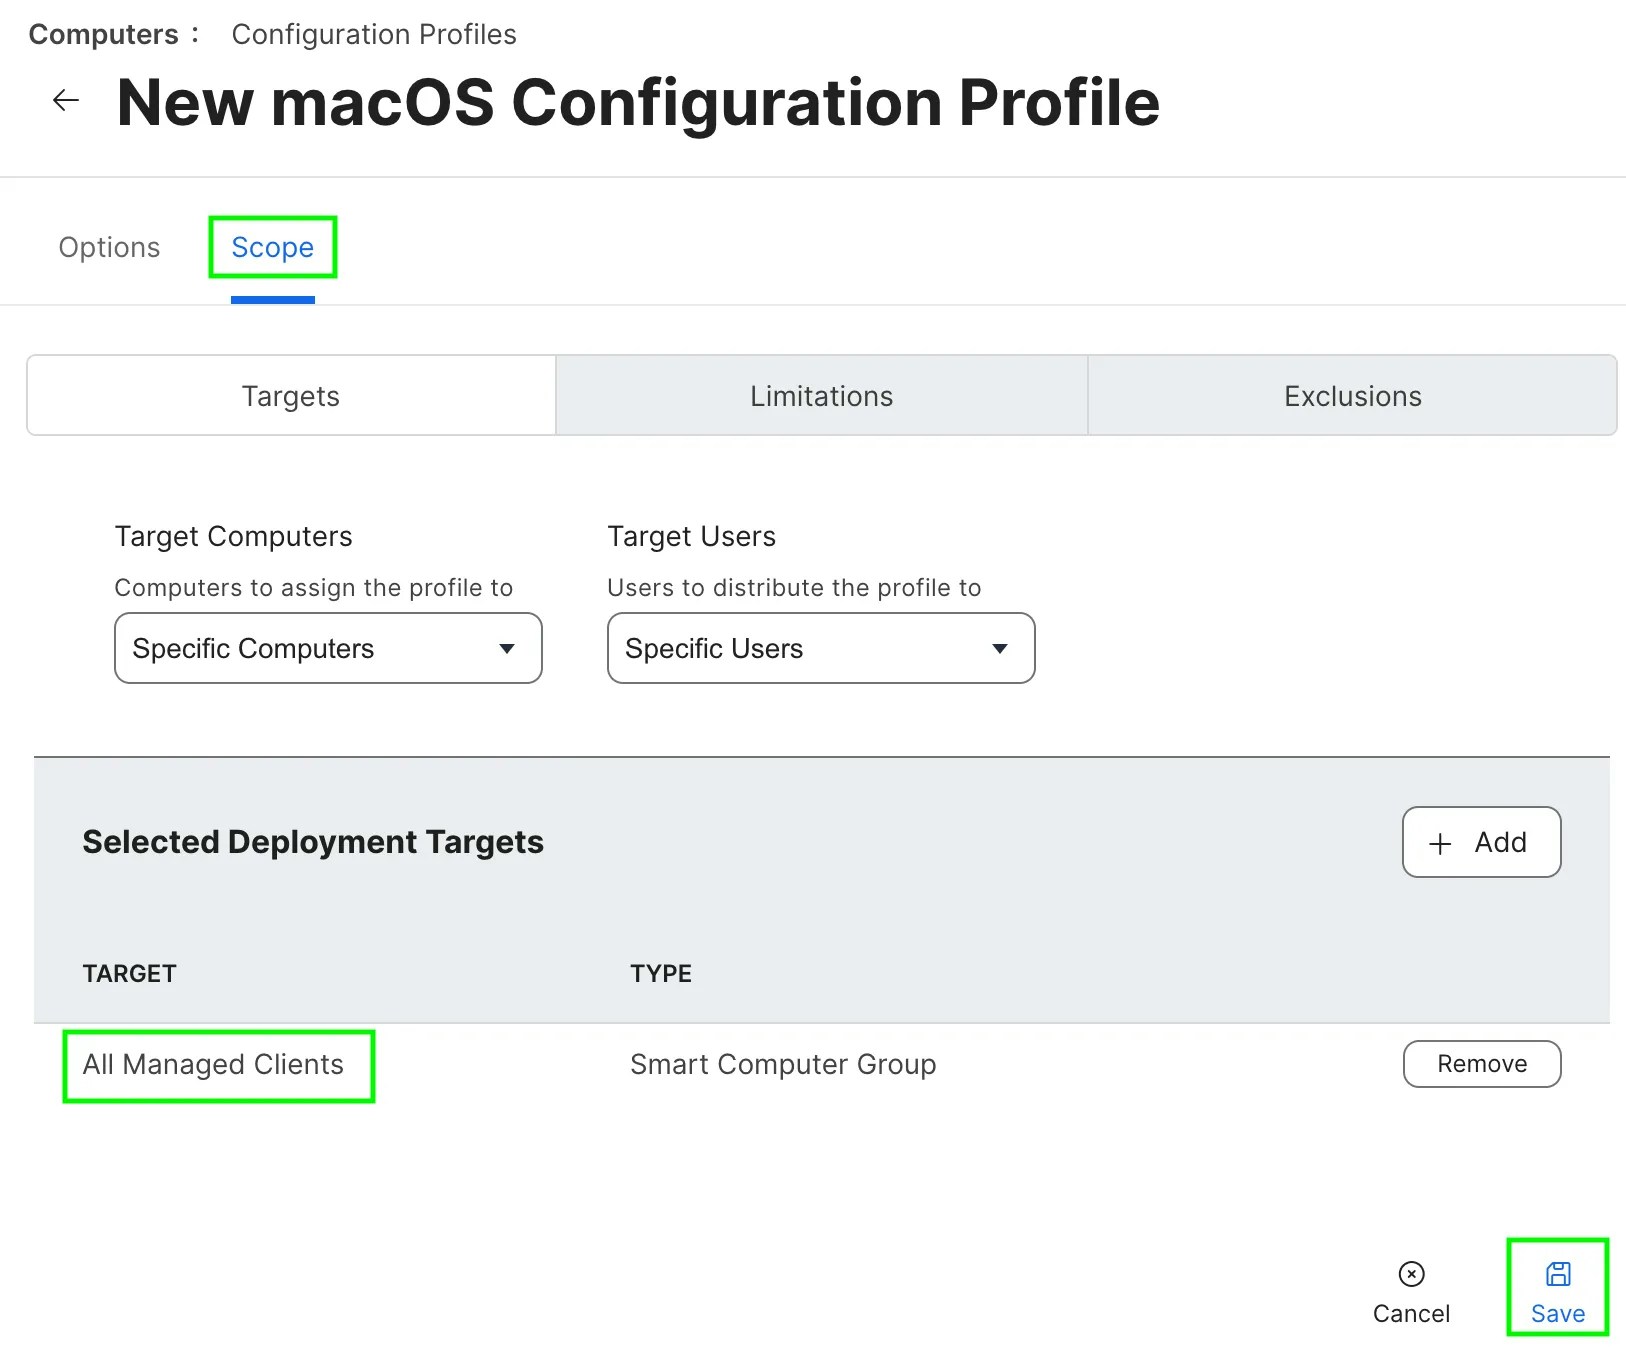
Scope the profile to all computers where you plan to deploy Zappl (e.g. *All Managed Clients*), then click **Save**.
### Customise Preferences
Configure your desired Zappl behaviour and user experience using the keys outlined in our [Preferences page](/customise/preferences).
Scope the profile to all computers where you plan to deploy Zappl (e.g. *All Managed Clients*), then click **Save**.
#### Managed Login Items
As of macOS 13 (Ventura), users can disable launch daemons through the Login Items option in System Settings. Zappl uses launch daemons to run automatically in the background, and these daemons must always be enabled for Zappl to function.
> The following profile ensures Zappl can run in the background by preventing users from disabling Zappl's launch daemons. This is achieved by whitelisting Zappl's Team ID (`JTYACQP7Y5`).
Download our [.mobileconfig file](https://latestinstaller.zappl.co/Resources/Configuration%20Profiles/Zappl%20-%20Managed%20Login%20Items.mobileconfig?v=3.0.0).
In Jamf Pro, navigate to *Computers > Configuration Profiles* and click **Upload**.
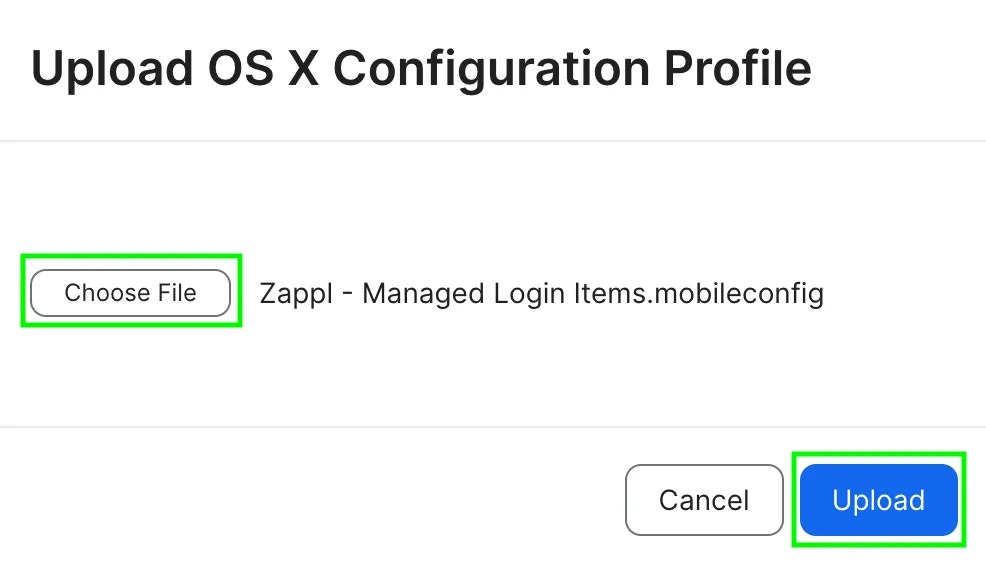
Click **Choose File**, then locate the `.mobileconfig` file you downloaded in the first step and click **Upload**.
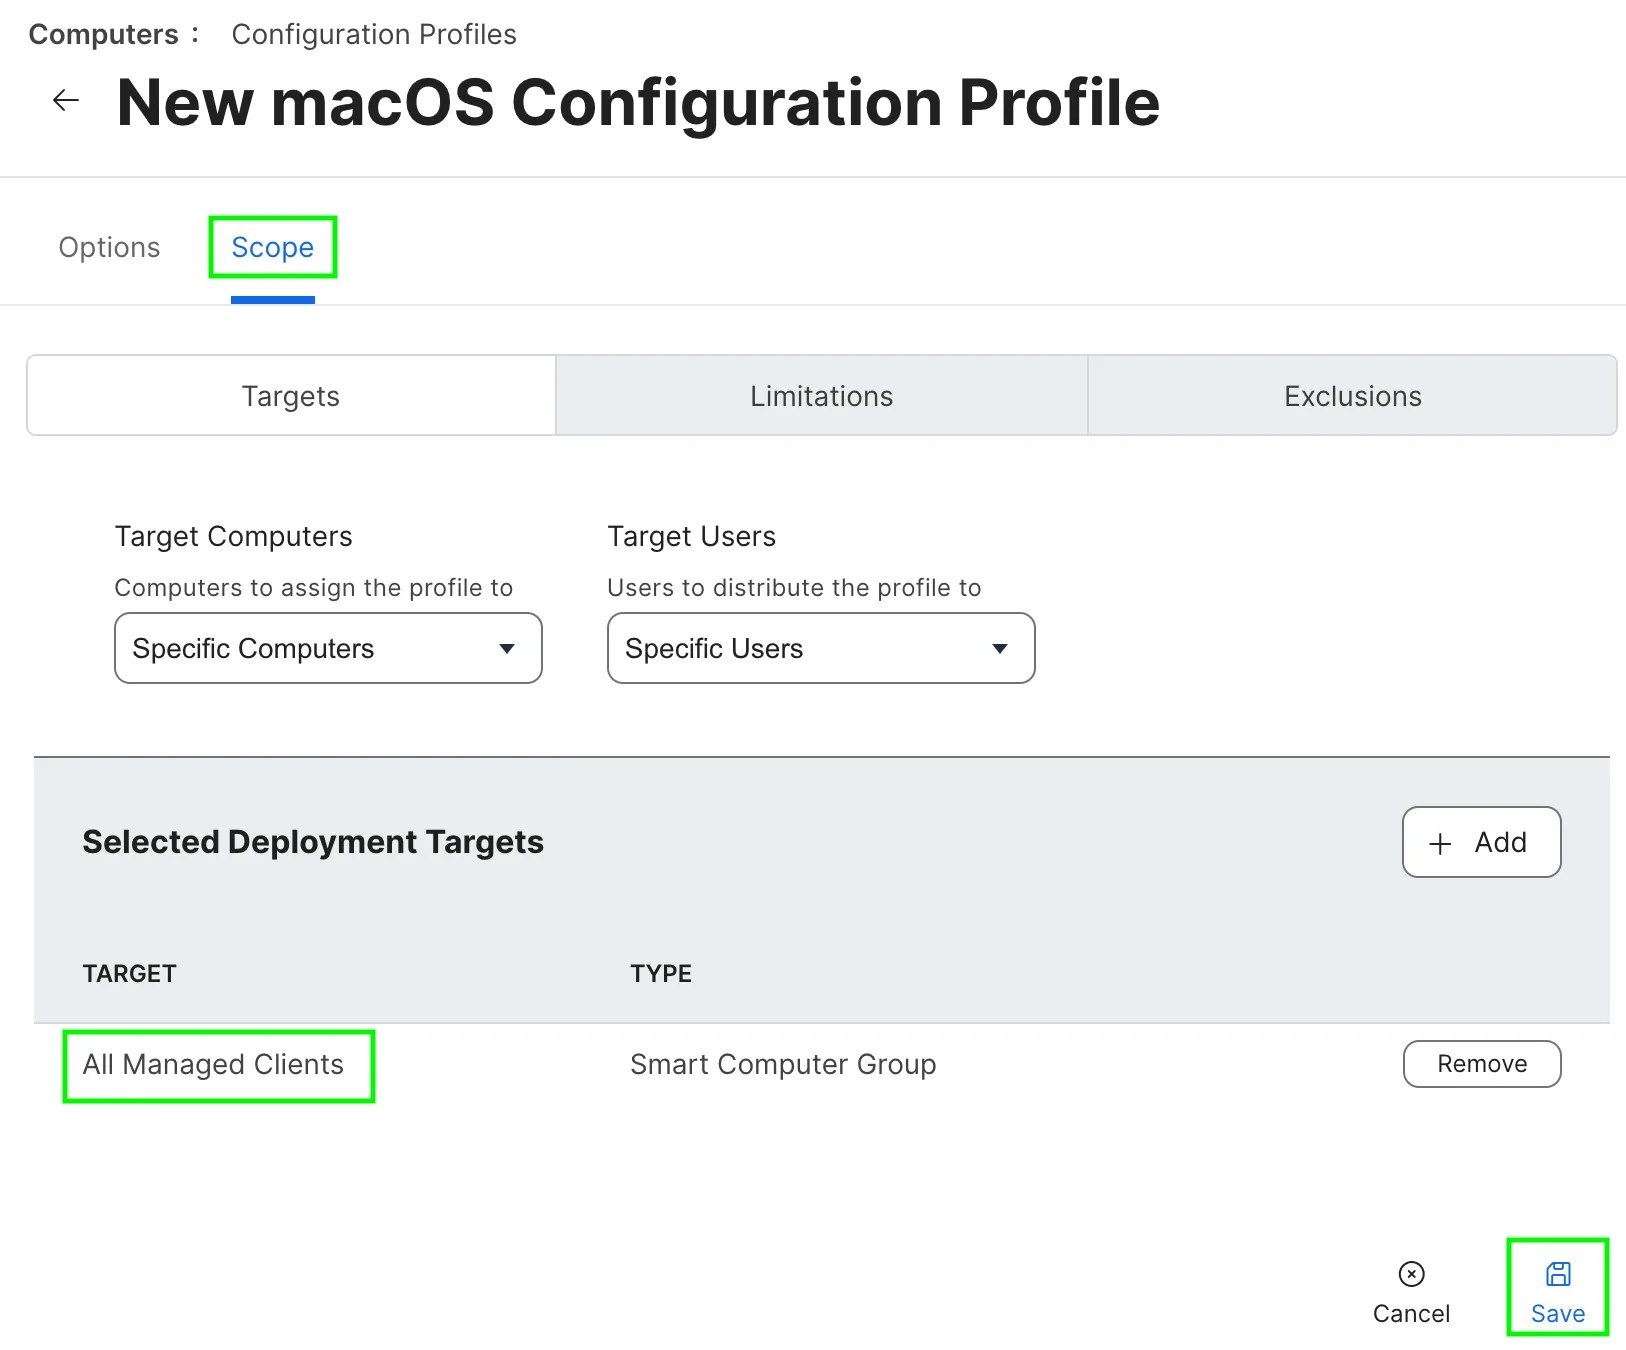
 Click **Scope**, add your desired scope target for the profile and click **Save**.
#### Full Disk Access
As of macOS 13 (Ventura), full disk access is required in order to update or remove macOS apps. The Zappl agent is responsible for performing all app updates, therefore full disk access (`SystemPolicyAllFiles`) needs to be granted to the agent via a configuration profile.
> To ensure Zappl is allowed to perform updates, simply add the below configuration profile to your MDM and scope it out to devices which Zappl will be deployed to.
Download our [.mobileconfig file](https://latestinstaller.zappl.co/Resources/Configuration%20Profiles/Zappl%20-%20PPPC.mobileconfig?v=3.0.0).
In Jamf Pro, navigate to *Computers > Configuration Profiles* and click **Upload**.
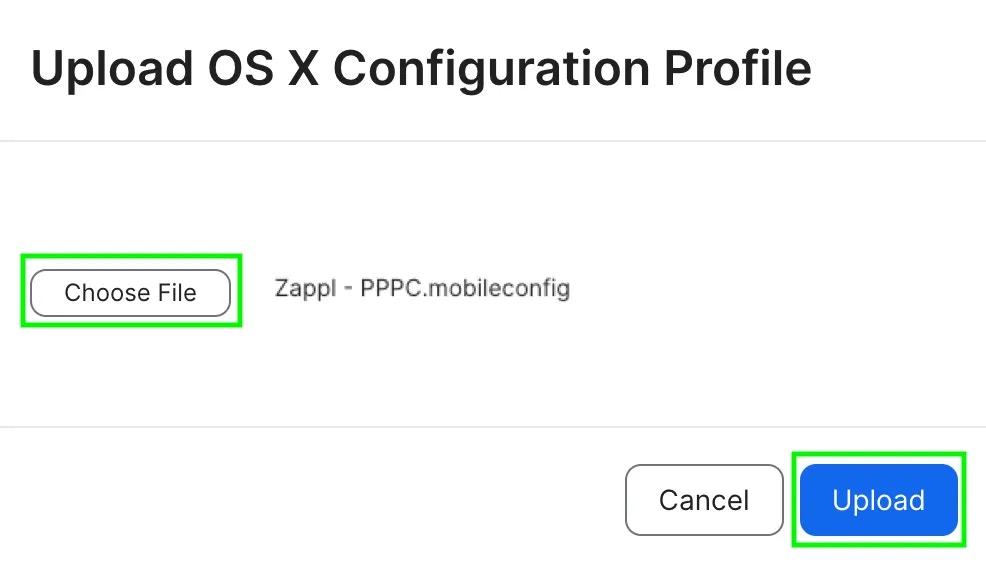
Click **Choose File**, then locate the `.mobileconfig` file you downloaded in the first step and click **Upload**.
 Click **Scope**, add your desired scope target for the profile and click **Save**.
#### Notifications
Zappl and AppBar use macOS notifications to alert users of available updates, completed installs, and any failures. These notifications must be pre-approved via a configuration profile, otherwise macOS will prompt users to allow them individually.
> To ensure Zappl and AppBar notifications are approved, simply add the below configuration profile to your MDM and scope it out to devices which Zappl will be deployed to.
Download our [.mobileconfig file](https://latestinstaller.zappl.co/Resources/Configuration%20Profiles/Zappl%20-%20Notifications.mobileconfig?v=3.0.0).
In Jamf Pro, navigate to *Computers > Configuration Profiles* and click **Upload**.
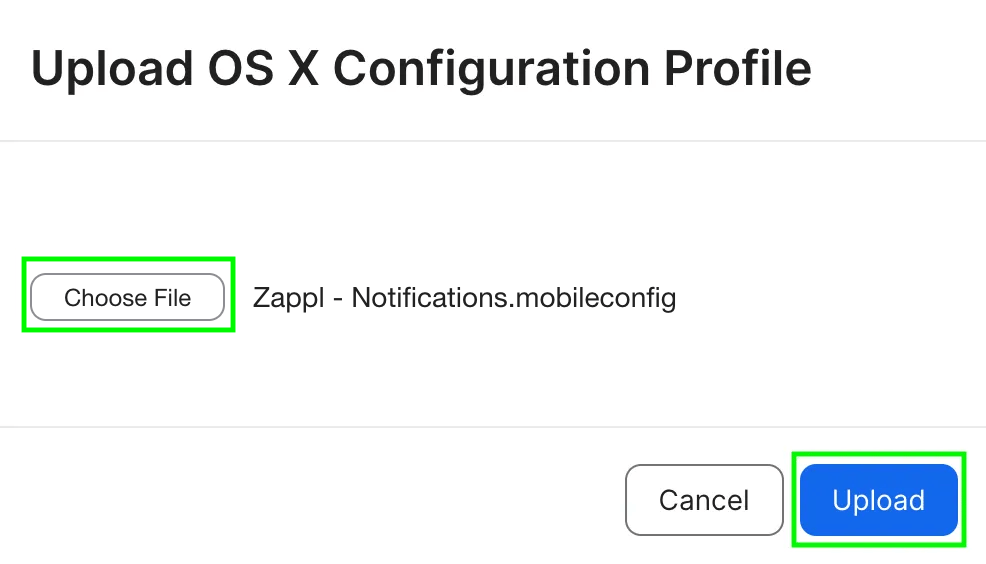
Click **Choose File**, then locate the `.mobileconfig` file you downloaded in the first step and click **Upload**.
 Click **Scope**, add your desired scope target for the profile and click **Save**.
## Deploy the Installer
You can easily deploy the latest version of Zappl to your estate using our Zappl installer script. Follow the steps below to add the script to your Jamf Pro server and deploy Zappl using a policy.
Download our [Zappl installer script](https://latestinstaller.zappl.co/Resources/Scripts/Install%20Zappl.zsh).
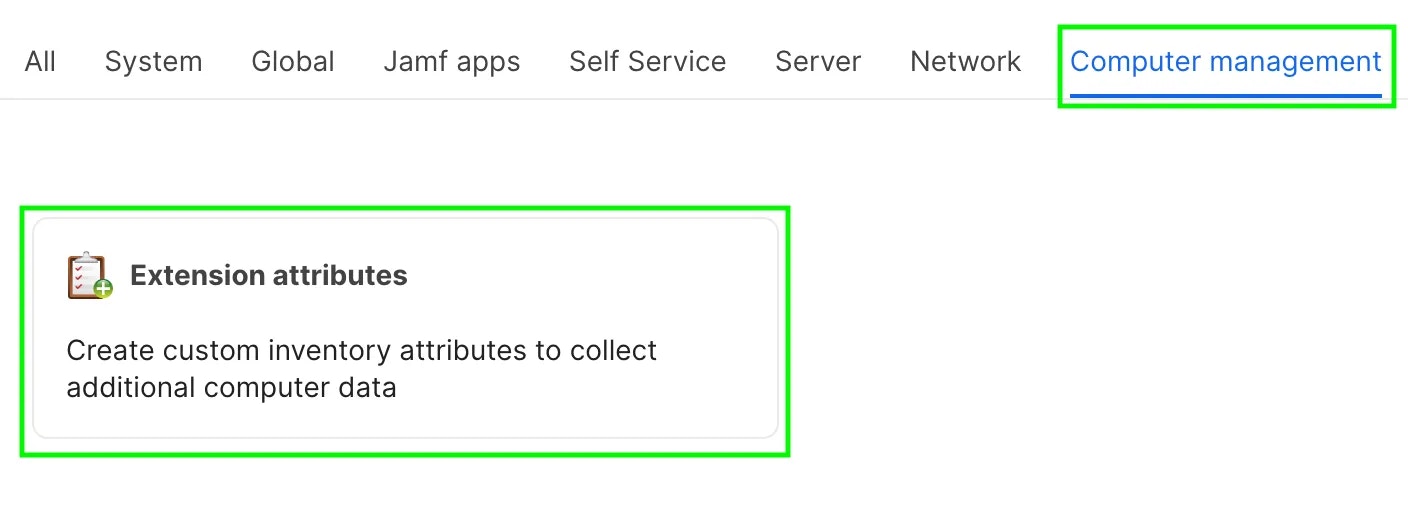
In Jamf Pro, navigate to *Settings > Computer Management > Scripts* and click **New**.
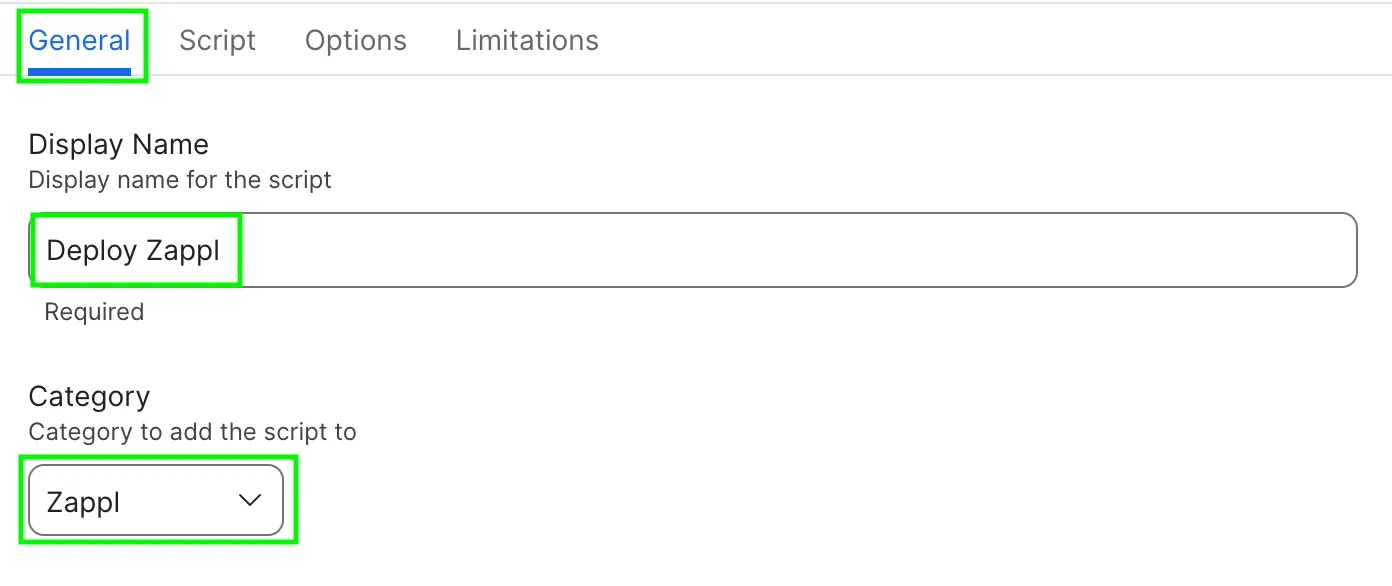
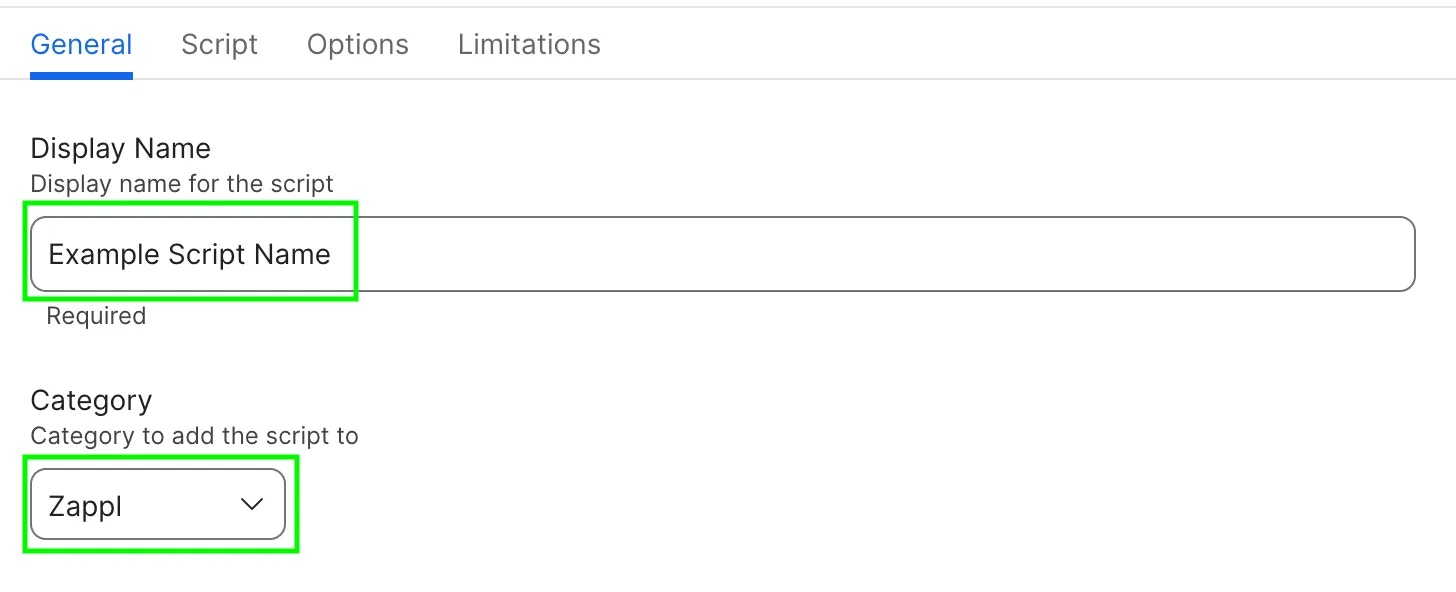
In the *General* tab, give the new script a name and assign it to a category.
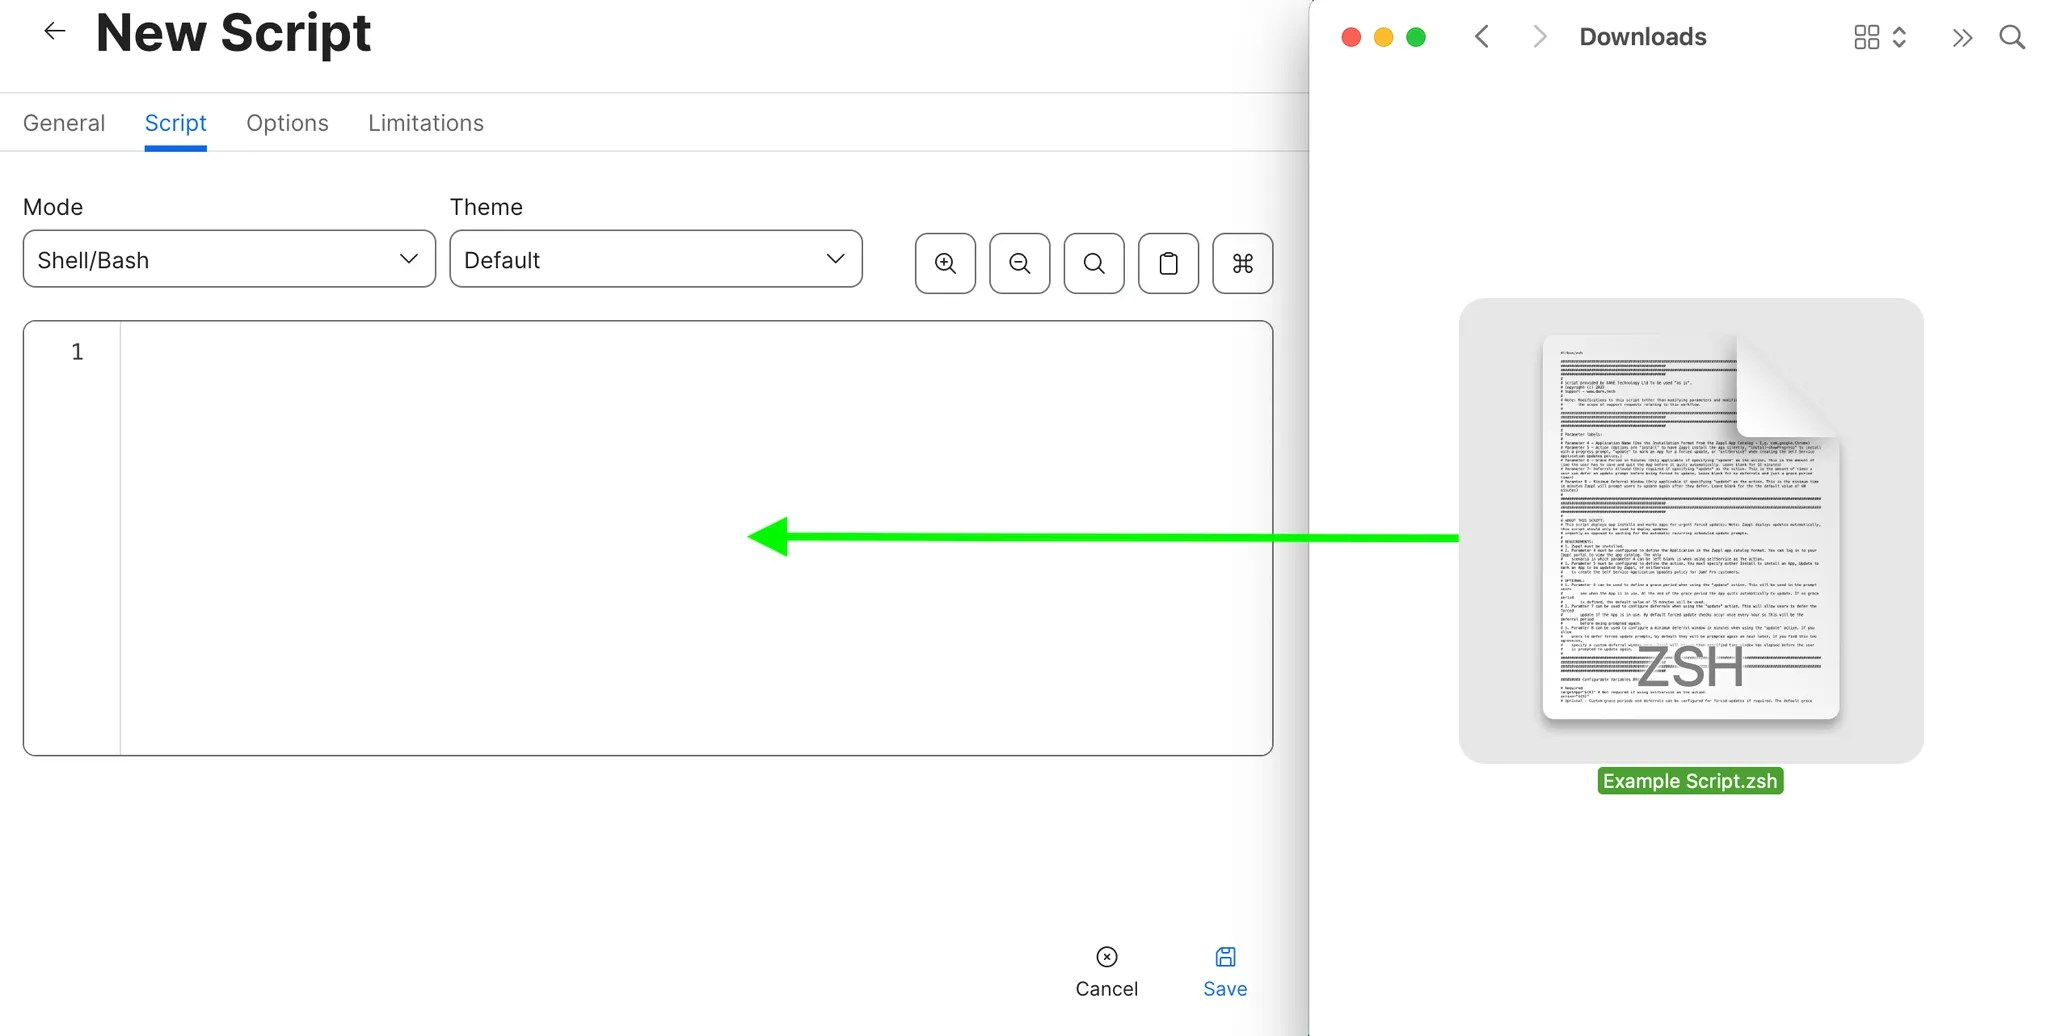
 In the Script tab, drag and drop the `Install Zappl.zsh` script you downloaded in **Step 1** into the text area.
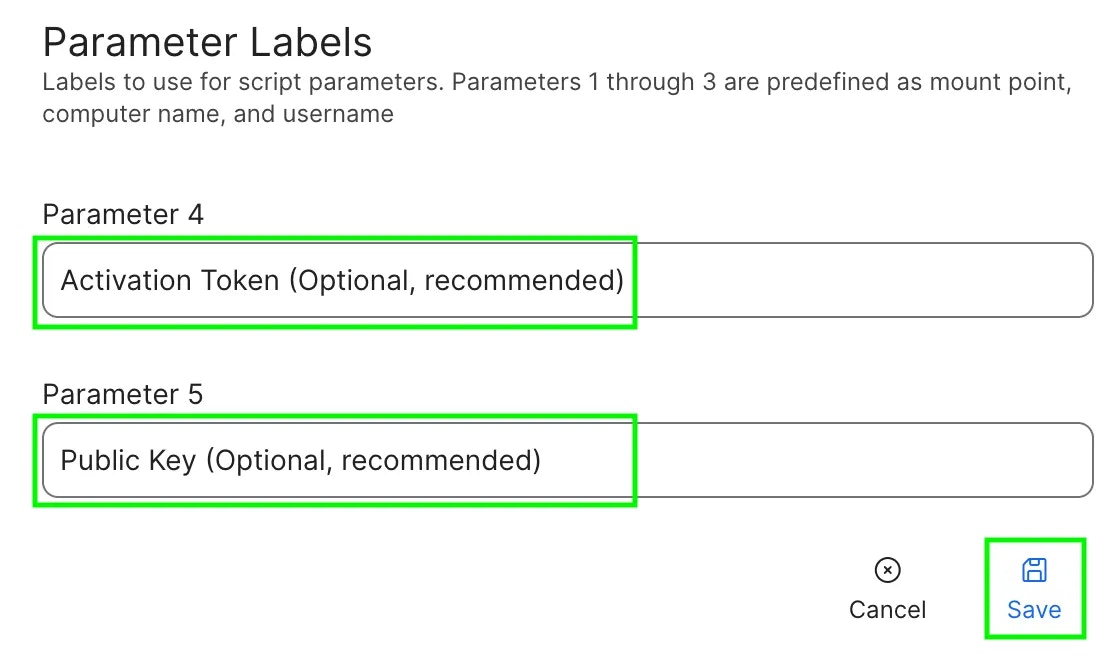
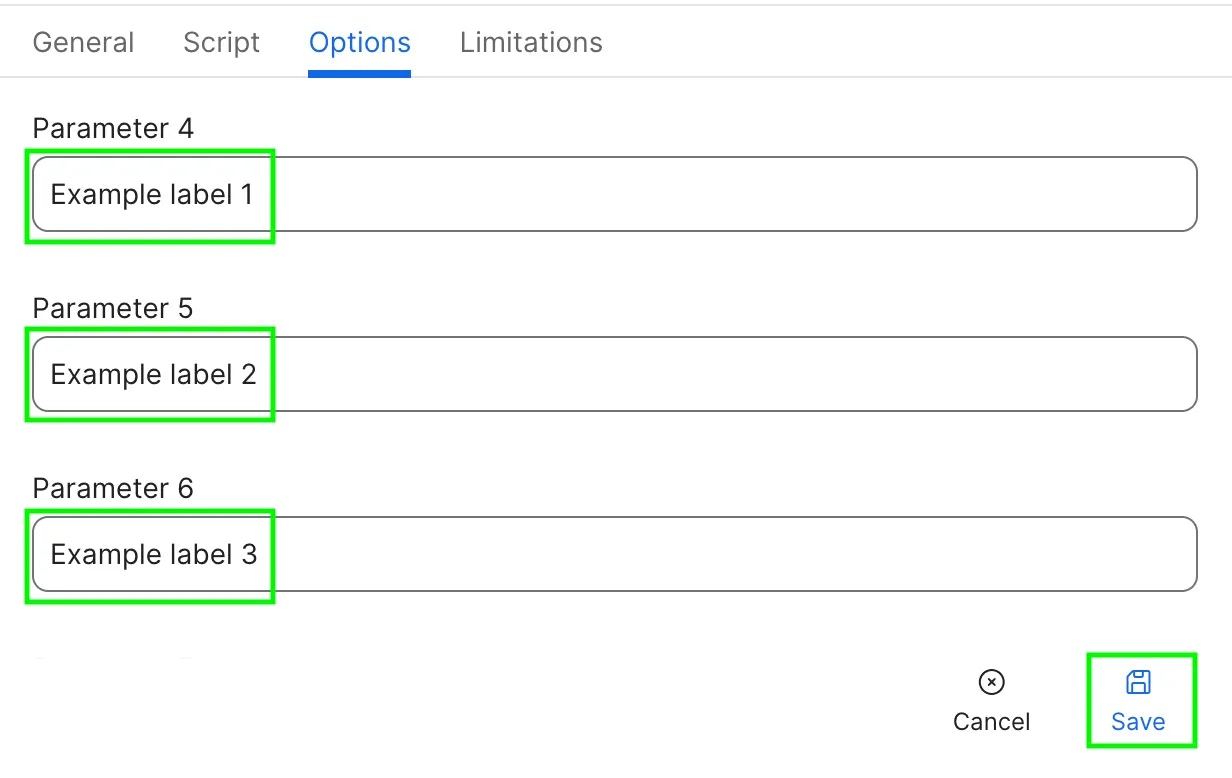
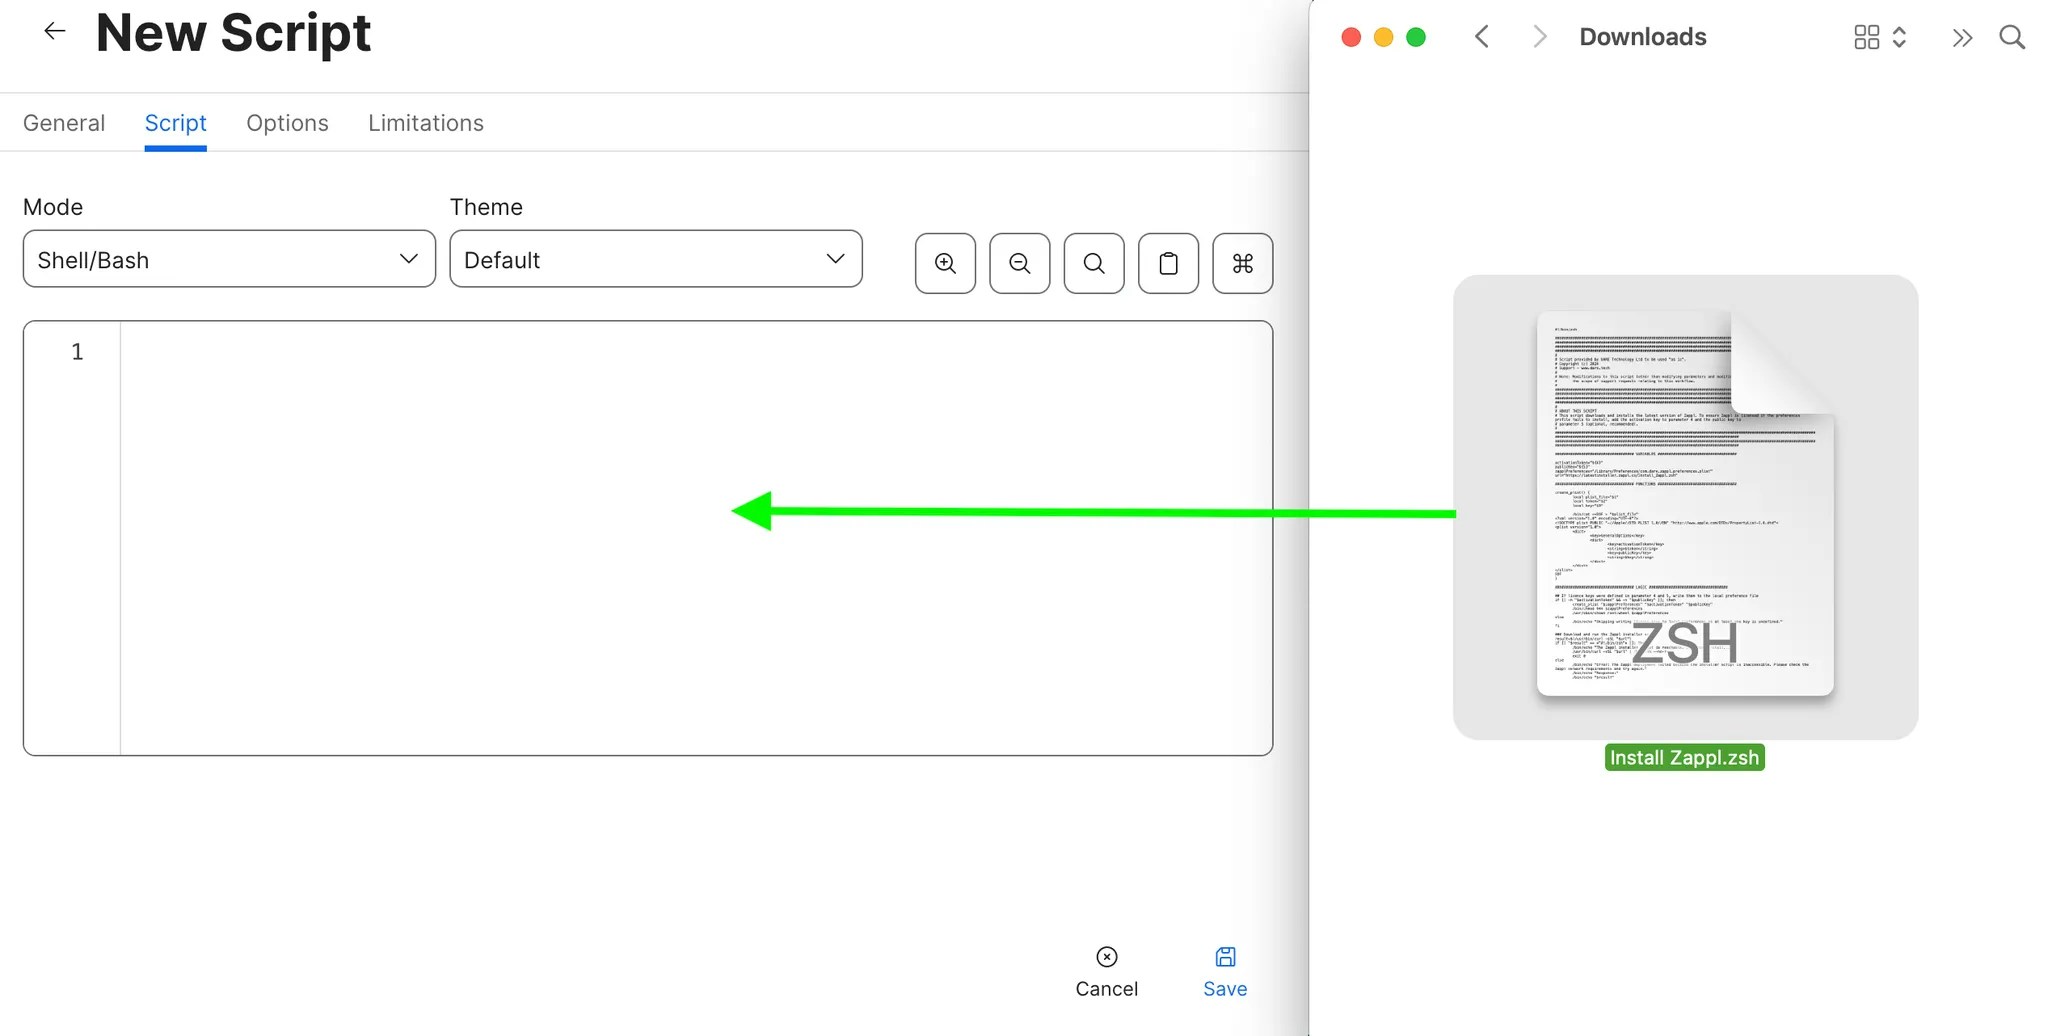 In the **Options** tab, set the below parameter labels for parameter 4 and 5 and click **Save**.
**Parameter 4 |** `Activation Token (Optional, recommended)`
**Parameter 5 |** `Public Key (Optional, recommended)`
In the **Options** tab, set the below parameter labels for parameter 4 and 5 and click **Save**.
**Parameter 4 |** `Activation Token (Optional, recommended)`
**Parameter 5 |** `Public Key (Optional, recommended)`
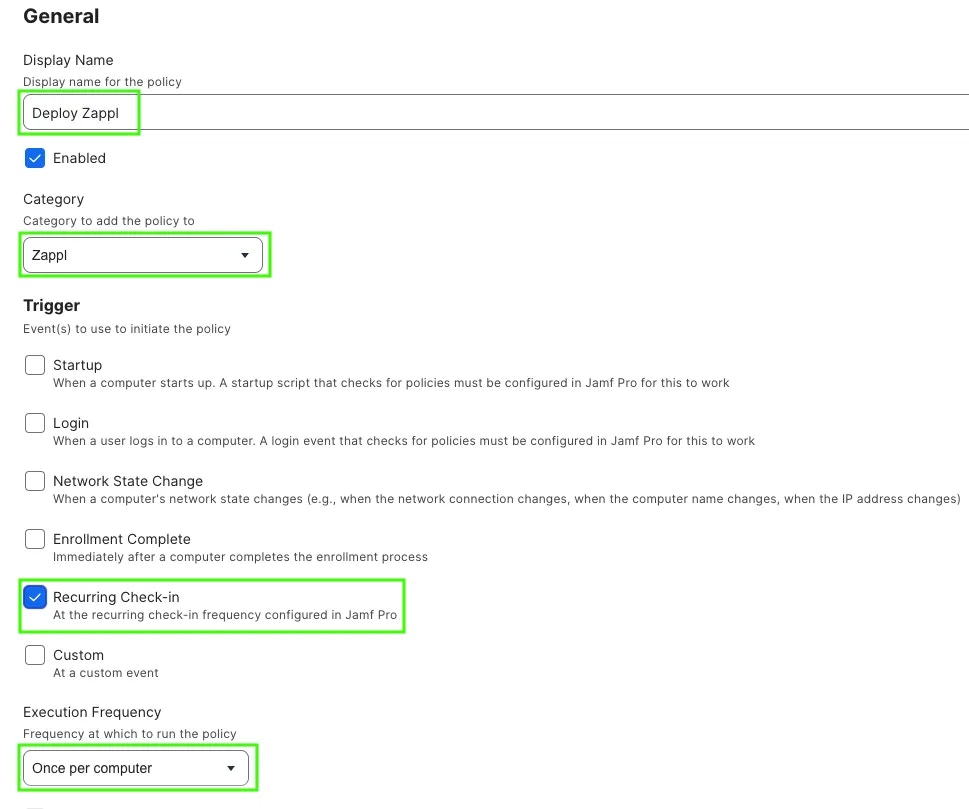
 Navigate to *Computers > Policies* and click **New**.
In the **General** payload, give the policy a name, assign it to a category, set the trigger as **Recurring Check-in** and set the execution frequency as **Once per computer**.
Navigate to *Computers > Policies* and click **New**.
In the **General** payload, give the policy a name, assign it to a category, set the trigger as **Recurring Check-in** and set the execution frequency as **Once per computer**.
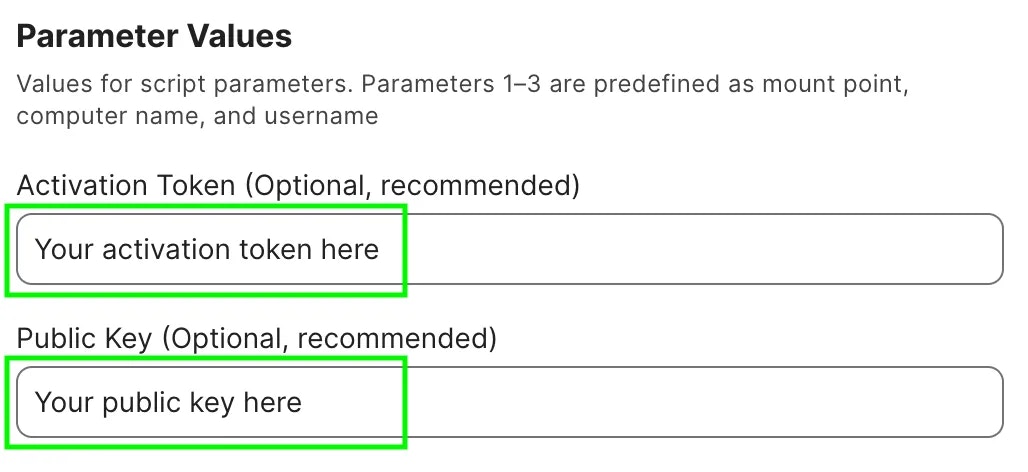
 In the **Scripts** payload, click **Configure**, then locate the Deploy Zappl script you added in the previous steps and click **Add**.
 We recommend that you paste your customer-specific activation and public keys to the first 2 script parameters. This will ensure Zappl activates even if the configuration profile fails to install. If you do not know your activation and public keys, [contact our helpdesk](mailto:helpdesk@dare.tech).
 In the **Scope** tab, select your desired scoping target for the Zappl deployment and click **Save**.
Zappl is a patch management tool that actively downloads and installs software updates in the background. When deploying to **large numbers of devices on the same network**, we strongly recommend **phasing your rollout in batches** rather than deploying to your entire fleet at once. Deploying to all devices on the same network in one go will result in all outdated apps downloading updates simultaneously on the first run, which may result in significant network load.
In the **Scope** tab, select your desired scoping target for the Zappl deployment and click **Save**.
Zappl is a patch management tool that actively downloads and installs software updates in the background. When deploying to **large numbers of devices on the same network**, we strongly recommend **phasing your rollout in batches** rather than deploying to your entire fleet at once. Deploying to all devices on the same network in one go will result in all outdated apps downloading updates simultaneously on the first run, which may result in significant network load.
## Additional Scripts
**The following scripts are optional for deploying Zappl but provide extra functionality.** It's recommended to add these scripts to your Jamf Pro environment while setting up the Zappl deployment, ensuring they're readily available when needed.
#### Deploy Software Script
**This script enables the installation of any app from our [app catalog](https://zappl.co/app-catalog).** It eliminates the need for Jamf Pro admins to manually package and deploy software. For instructions on using this script, refer to Adding Scripts to Jamf Pro below.
Download our [Deploy Software script](https://latestinstaller.zappl.co/Resources/Scripts/Zappl%20-%20Deploy%20Software.zsh), and utilise the Parameter Labels below.
Application Name (Use the Installation Format from the Zappl App Catalog - E.g. com.google.Chrome)
Action (Options are "install" to have Zappl install the App silently, "install-showProgress" to install with a progress prompt or "update" to mark an App for a forced update)
Grace Period in Minutes (Only applicable if specifying "update" as the action. This is the amount of time the user has to save and quit the App before it quits automatically. Leave blank for 15 minutes)
Deferrals Allowed (Only applicable if specifying "update" as the action. This is the amount of times a user can defer an update prompt before being forced to update. Leave blank for no deferrals and just a grace period timer)
Minimum Deferral Window (Only applicable if specifying "update" as the action. This is the minimum time in minutes Zappl will prompt users to update again after they defer. Leave blank for the the default value of 60 minutes)
#### Collect Logs Script
This script provides an easy method for collecting Zappl log files when troubleshooting. For instructions on using this script, refer to Adding Scripts to Jamf Pro below.
Download our [Log Collection script](https://latestinstaller.zappl.co/Resources/Scripts/Zappl%20-%20Collect%20Logs.zsh), and utilise the Parameter Labels below.
Jamf Pro URL
API Client ID
API Client Secret
#### Adding Scripts to Jamf Pro
Follow the steps below to add either of the above scripts to your Jamf Pro server.
For information on using the Deploy Software script, see [Application Installations](/apps/installs).
For information on using the Log Collection script, see [Logs and Errors](/other/logs-errors).
In Jamf Pro, navigate to *Settings > Computer Management > Scripts* and click **New**.
In the **General** tab, give the script a name and assign it to a category.
 In the **Script** tab drag and drop the downloaded script into the text area.
 In the **Options** tab, paste in the parameter labels outlined above into the relevant parameter fields, then click **Save**.
## Extension Attributes
**Jamf Pro offers extension attributes which provide better visibility into Zappl's status across your estate.** While the Zappl portal displays all necessary information for admins, adding Jamf Pro extension attributes can be beneficial for administrators who primarily use Jamf Pro and may not have access to your Zappl portal.
**Download our pre-configured Extension Attributes [here](https://latestinstaller.zappl.co/Resources/Extension%20Attributes/Zappl%20Extension%20Attributes.zip?v=3.0.0).**
Displays whether Zappl is installed.
Displays which app updates are currently cached locally due to the app(s) being in use.
Displays how many recurring update deferrals are remaining.
Displays the output from the most recent recurring background update or any forced updates. This can range from simple information, such as whether the user chose to defer or install updates, to details about any errors encountered during the update process.
Displays the version of Zappl installed.
#### Adding Extension Attributes to Jamf Pro
Download the **Zappl Extension Attributes** above, then follow the steps outlined below to add the `.xml` files to your Jamf Pro server.
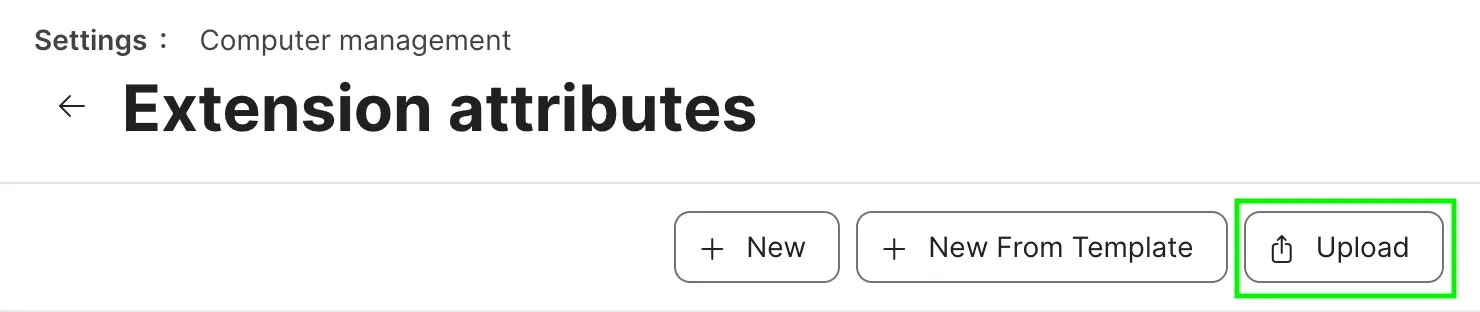
In Jamf Pro, navigate to *Settings > Computer Management > Extension Attributes*.
 Click **Upload**.
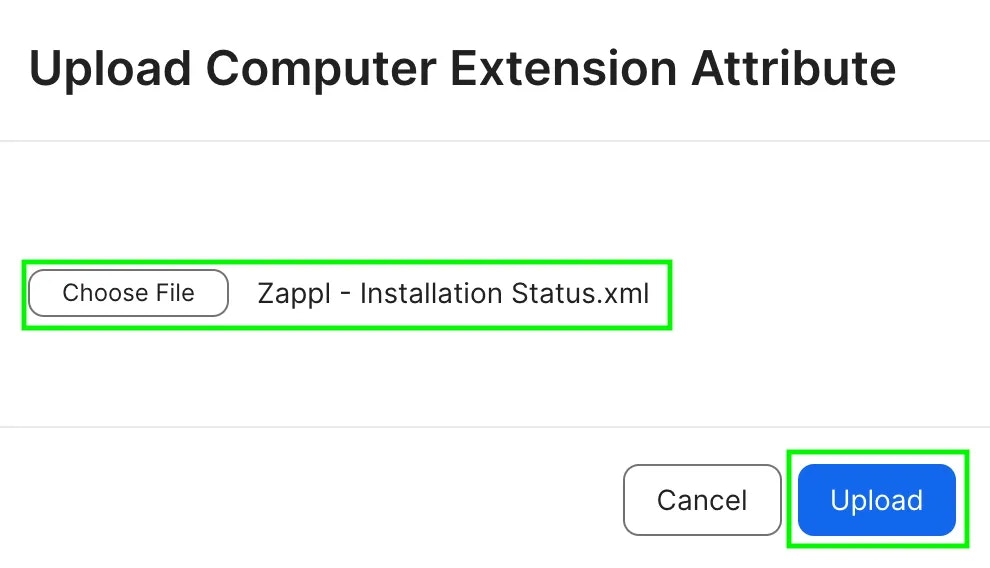
 Click **Choose File**, then select the extension attribute you wish to add, and click **Upload**.
 Optionally, change the **Inventory Display** dropdown to the category you would like Zappl information to be stored.
Finally, click **Save**.
Optionally, change the **Inventory Display** dropdown to the category you would like Zappl information to be stored.
Finally, click **Save**.