> ## Documentation Index
> Fetch the complete documentation index at: https://docs.zappl.co/llms.txt
> Use this file to discover all available pages before exploring further.
# Intune
> This guide provides step-by-step instructions on how to use Microsoft Intune to configure and deploy Zappl in your environment.
For a successful Zappl deployment with Intune, please follow the steps in the order outlined below. It is important that all configuration policies are deployed prior to the Zappl installer.
## Configuration Policies
### Zappl Preferences
We've utilised [iMazing Profile Editor](https://imazing.com/profile-editor) to provide an easy method of configuring Zappl preferences and generating a configuration profile for deployment.
Download and open [iMazing Profile Editor](https://imazing.com/profile-editor). Find the **Zappl Application Domain** and add the payload.
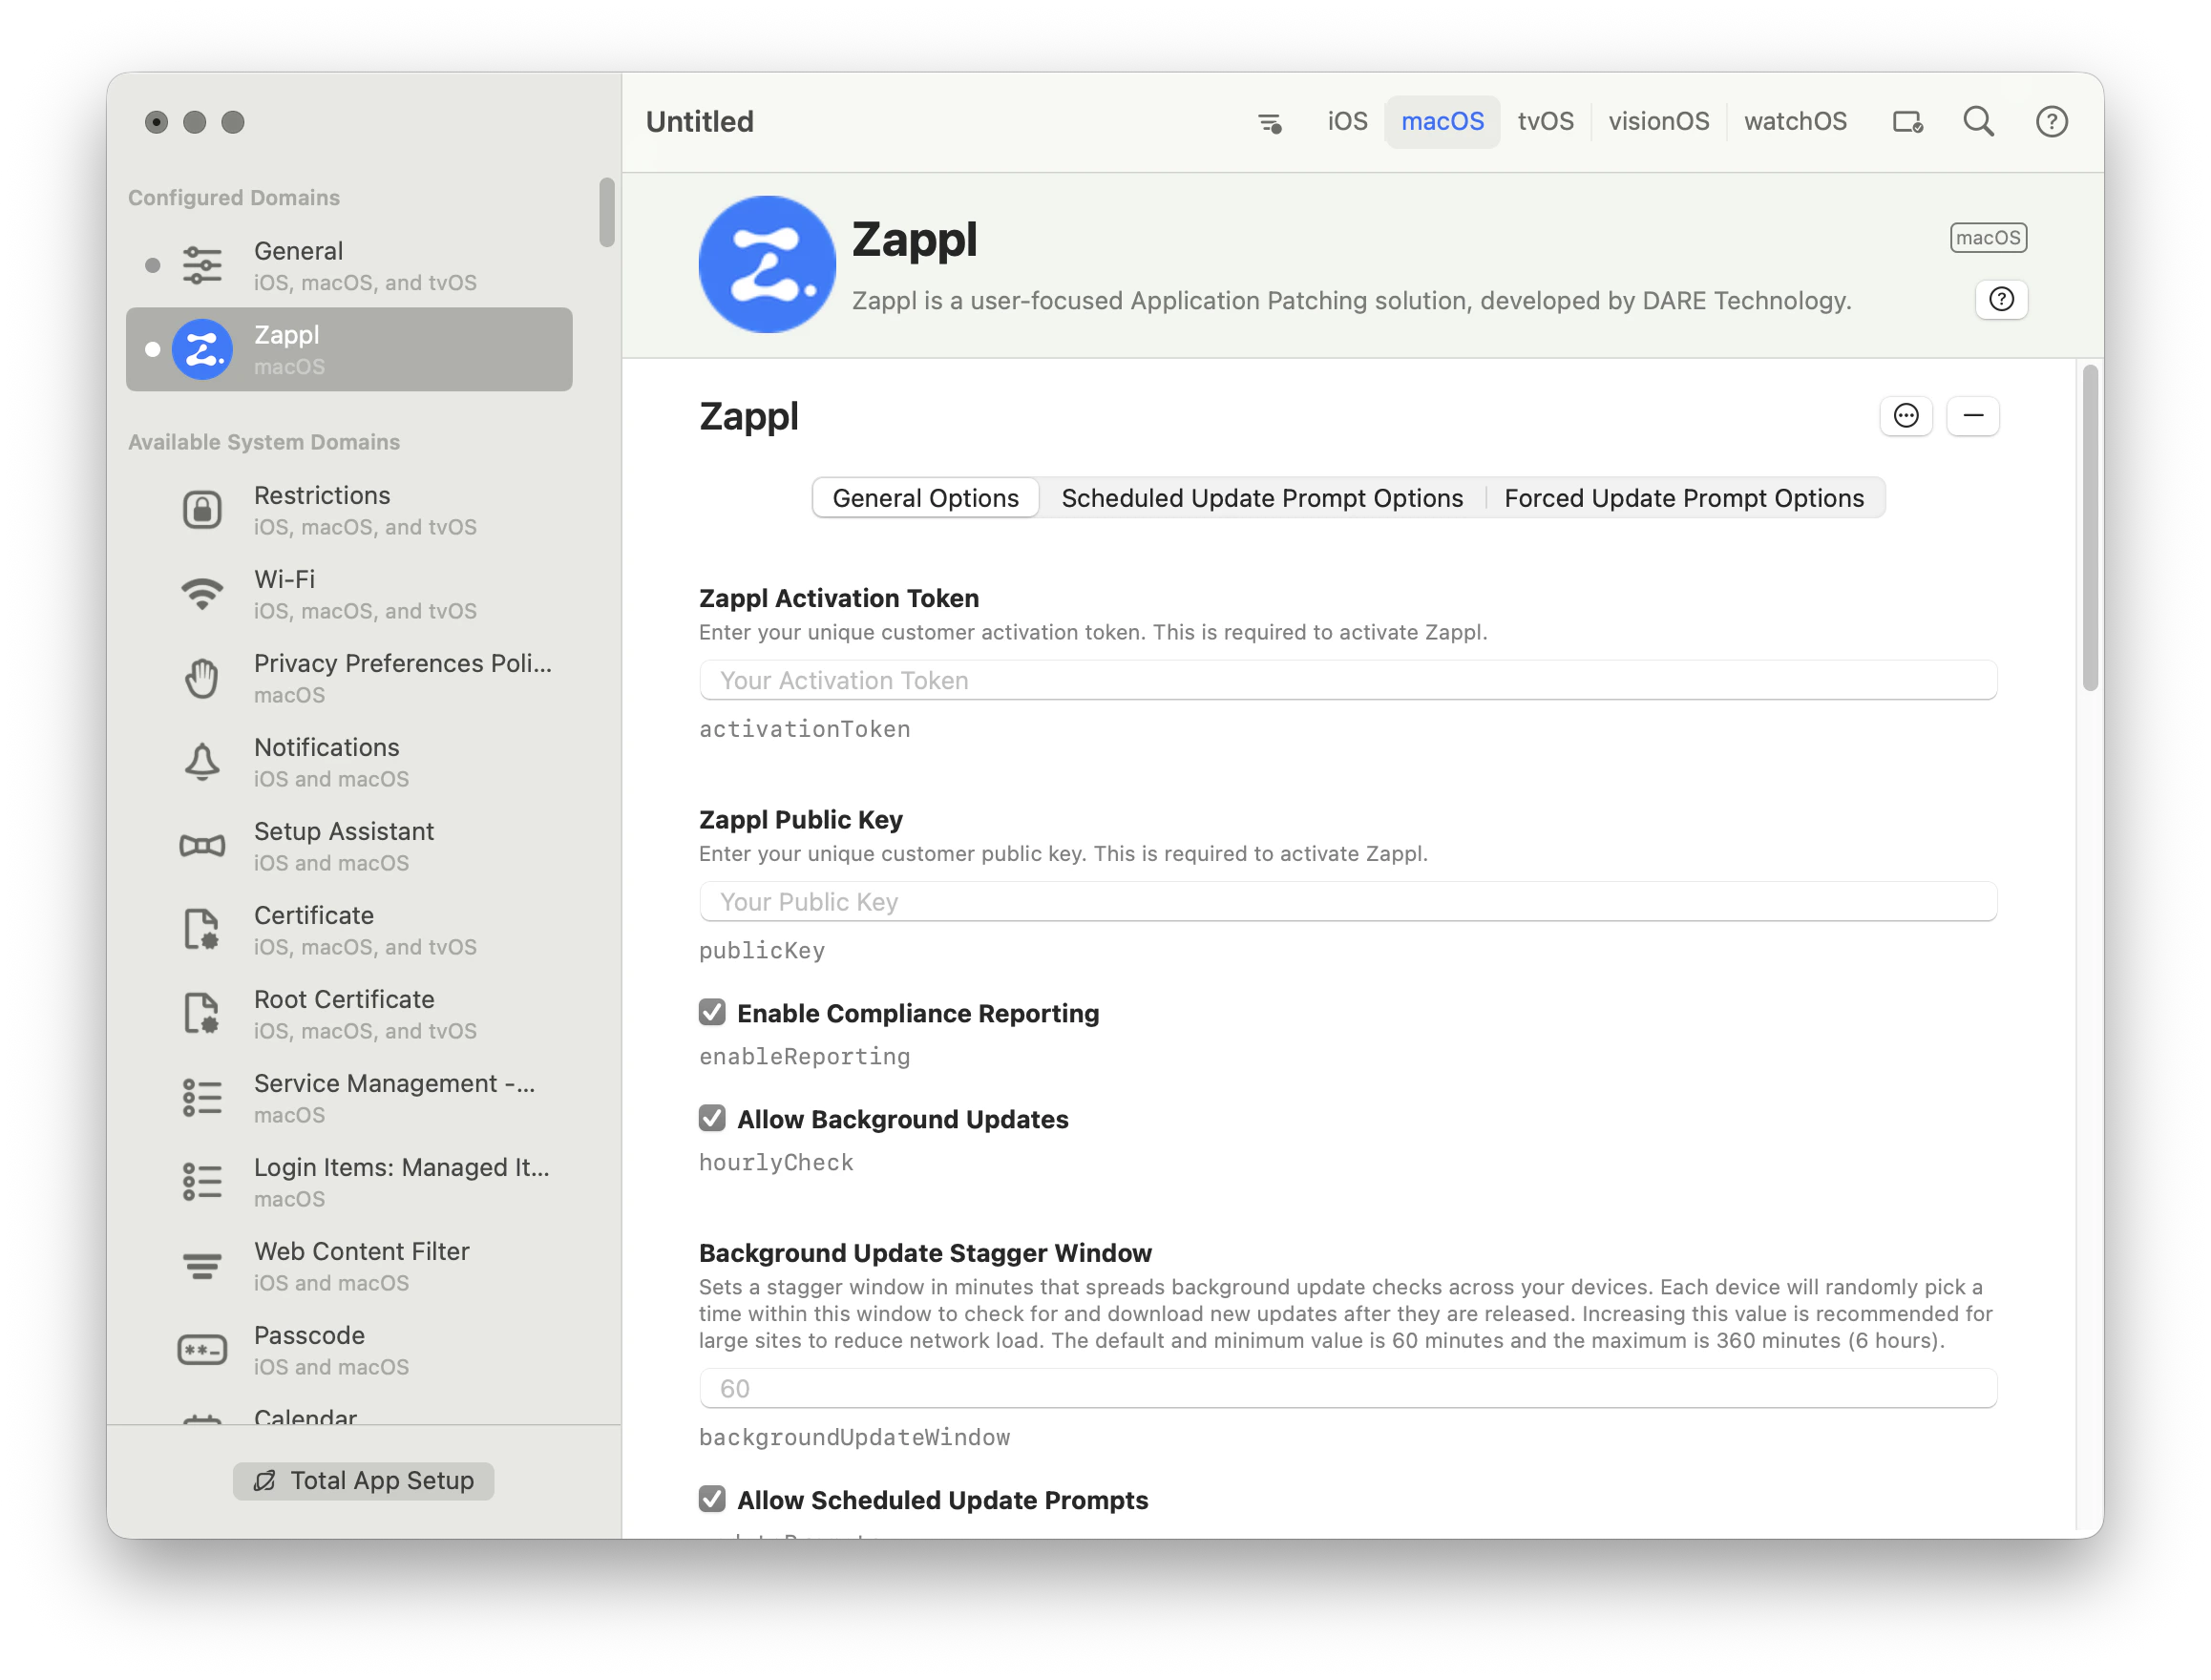 Add your **Zappl Activation Token** and **Public Key** to the payload. These are required to connect devices to the Zappl servers.
Alter any other preferences as required. Refer to our [preferences documentation](/customise/preferences) for information on all available keys.
Name and save the profile. This generates a `.mobileconfig` file ready for deployment via Intune.
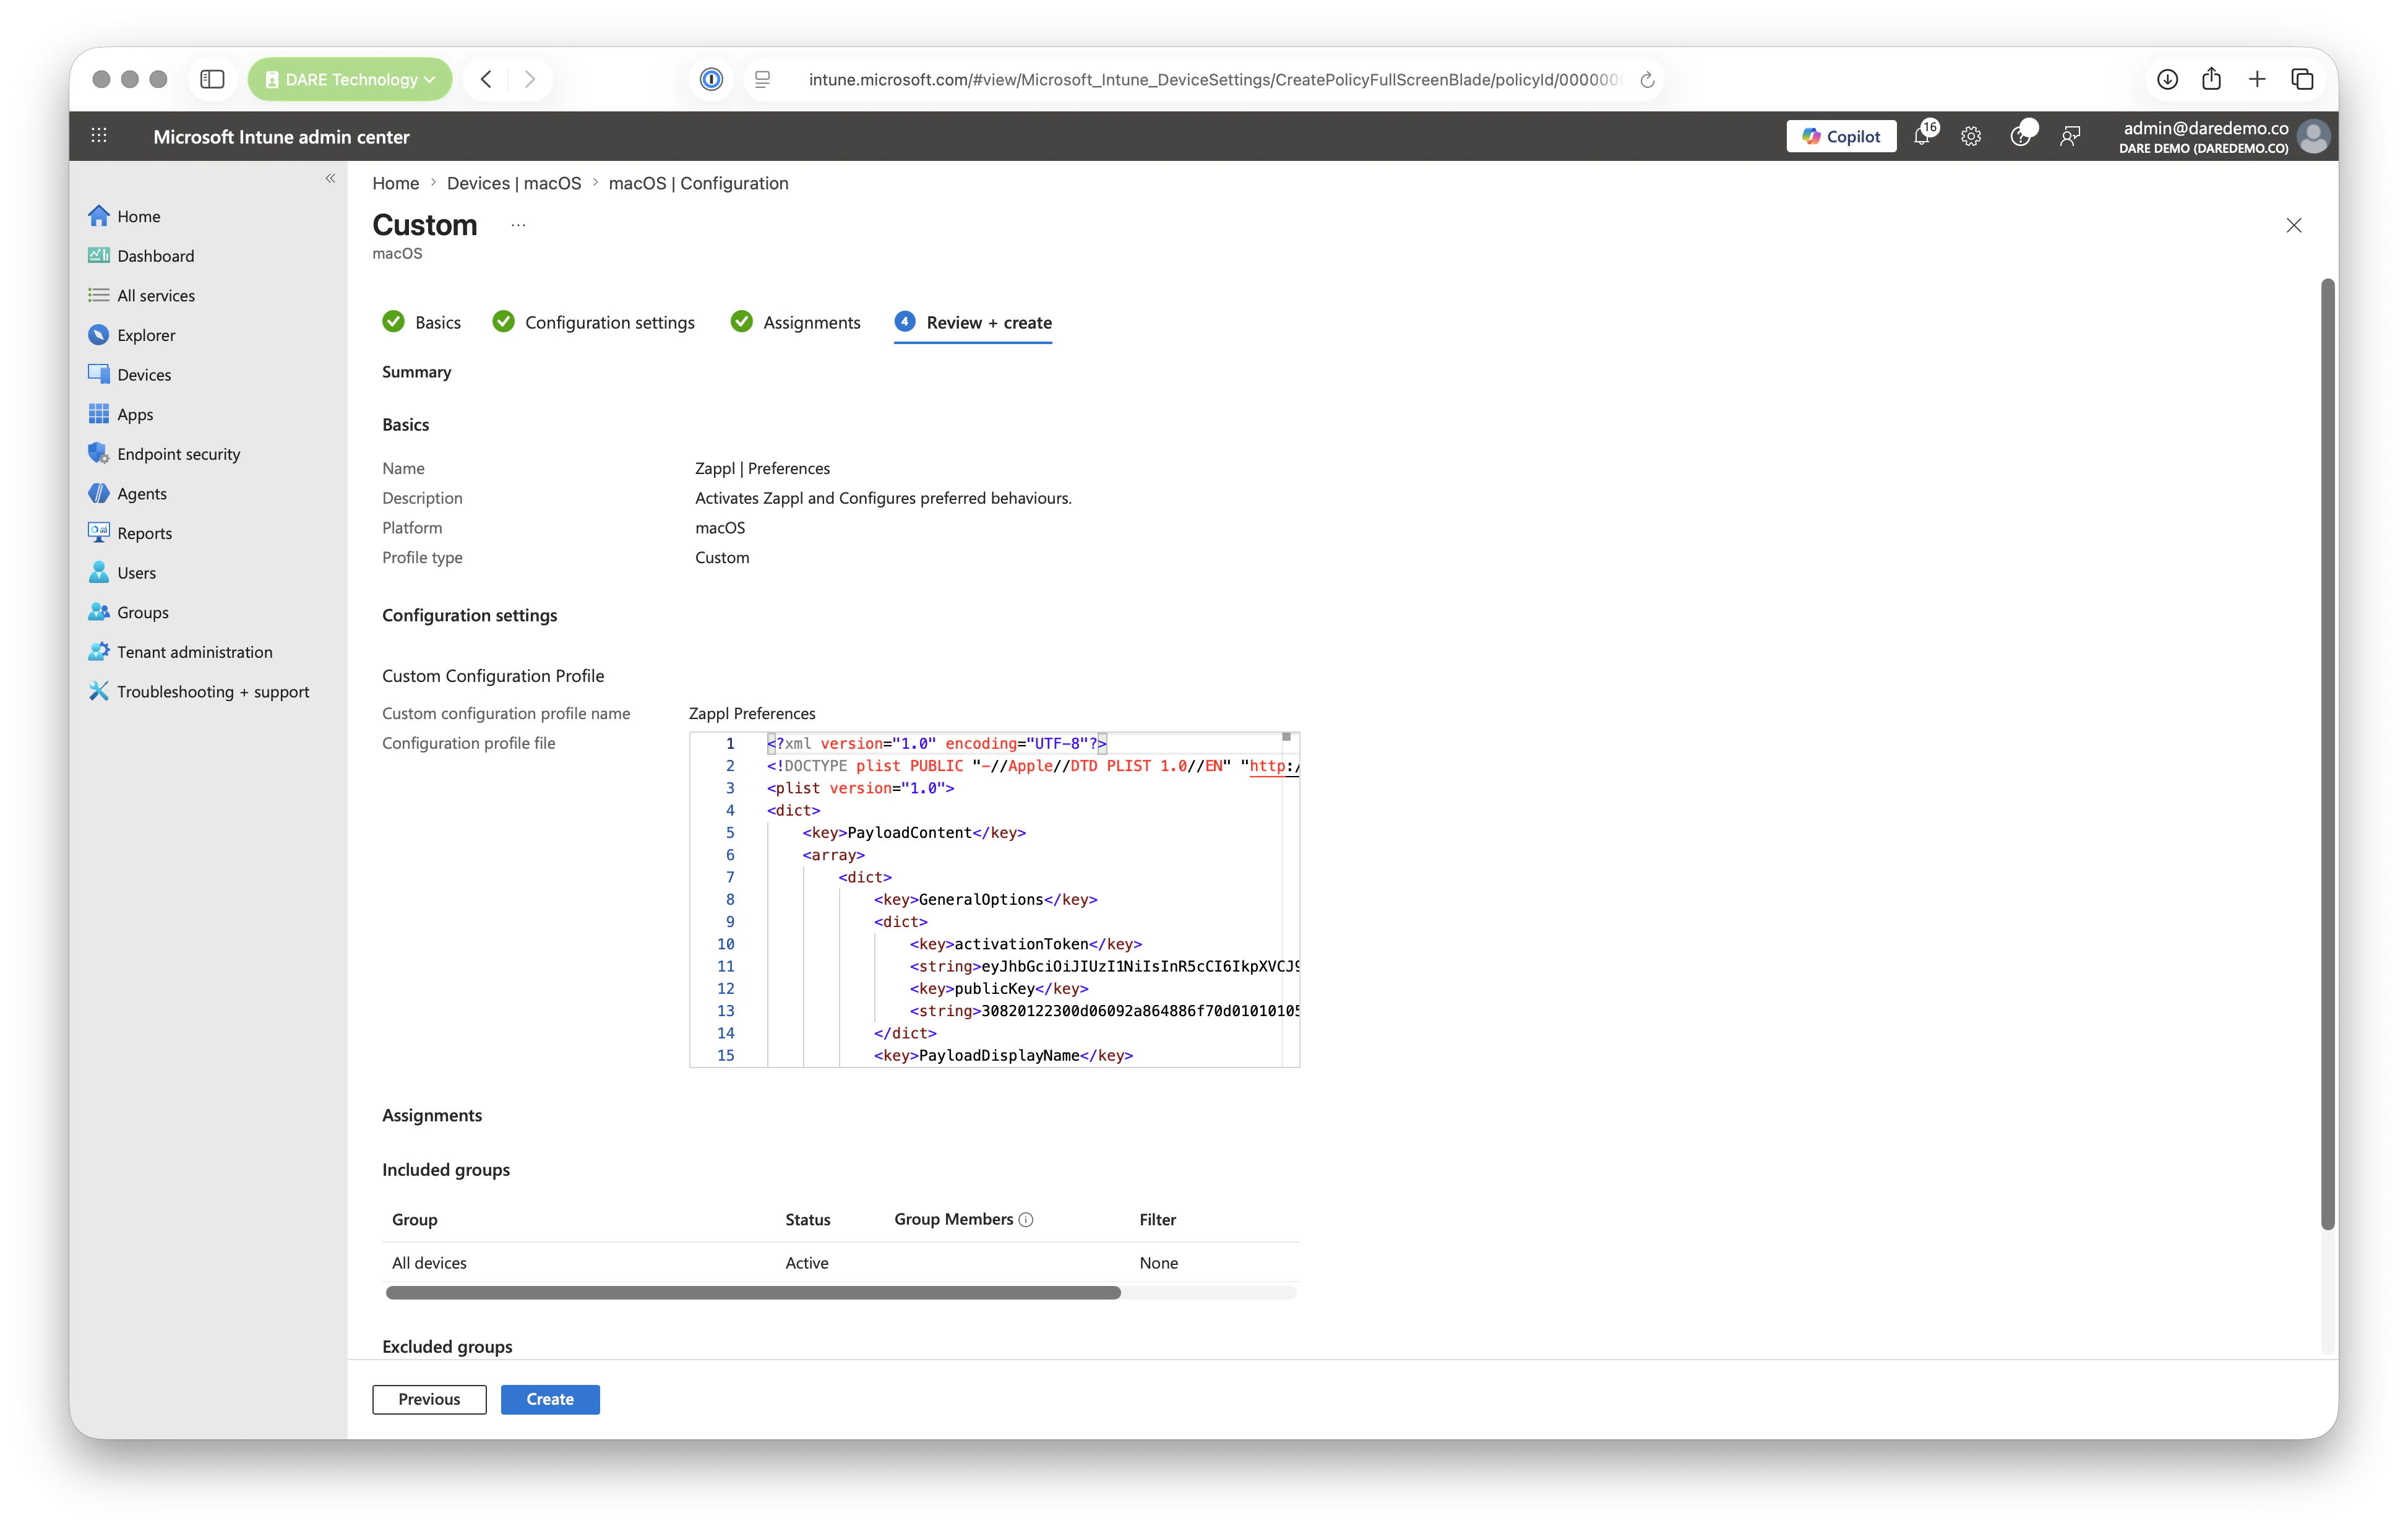
In Intune, navigate to *Devices > macOS > Configuration* and click **Create**, then **New Policy**. Set **macOS** as the platform, **Templates** as the Profile Type, and **Custom** as the Template Name.
Give the profile a name and description, then upload your `.mobileconfig` file under **Configuration Settings**. Add your assignments (e.g. *All devices*), then review and **Create** the policy.
Add your **Zappl Activation Token** and **Public Key** to the payload. These are required to connect devices to the Zappl servers.
Alter any other preferences as required. Refer to our [preferences documentation](/customise/preferences) for information on all available keys.
Name and save the profile. This generates a `.mobileconfig` file ready for deployment via Intune.
In Intune, navigate to *Devices > macOS > Configuration* and click **Create**, then **New Policy**. Set **macOS** as the platform, **Templates** as the Profile Type, and **Custom** as the Template Name.
Give the profile a name and description, then upload your `.mobileconfig` file under **Configuration Settings**. Add your assignments (e.g. *All devices*), then review and **Create** the policy.
### Additional Policies
As of macOS 13 (Ventura), full disk access is required in order to update or remove macOS apps. The Zappl agent is responsible for performing all app updates, therefore full disk access (`SystemPolicyAllFiles`) needs to be granted to the agent via a configuration profile.
As of macOS 13 (Ventura), users can disable launch daemons through the Login Items option in System Settings. Zappl uses launch daemons to run automatically in the background, and these daemons must always be enabled for Zappl to function.
Zappl and AppBar use macOS notifications to alert users of available updates, completed installs, and any failures. These notifications must be pre-approved via a configuration profile, otherwise macOS will prompt users to allow them individually.
Download the following policies as JSON files:
* [Full Disk Access](https://latestinstaller.zappl.co/Resources/Intune%20Policies/Zappl_PPPC.json?v=3.0.0)
* [Managed Login Item](https://latestinstaller.zappl.co/Resources/Intune%20Policies/Zappl_Managed%20Login%20Items.json?v=3.0.0)
* [Notifications](https://latestinstaller.zappl.co/Resources/Intune%20Policies/Zappl_Notifications.json?v=3.0.0)
In Intune, navigate to *Devices > macOS > Configuration* and click **Create**, then **Import**. Import each JSON file as a new policy, providing a name and description where necessary.
### AppBar Preferences
These steps are only necessary if you are choosing to automatically deploy AppBar alongside Zappl. See [this key](../customise/preferences#automatically-install-appbar) in the main Zappl Preferences for more information.
AppBar comes with its own preferences that can be configured for custom branding and behaviour options.
There are no **required** keys within AppBar's preferences. If you want to skip branding and behaviour customisation, you can skip these steps.
Find the **Zappl AppBar Application Domain** and add the payload.
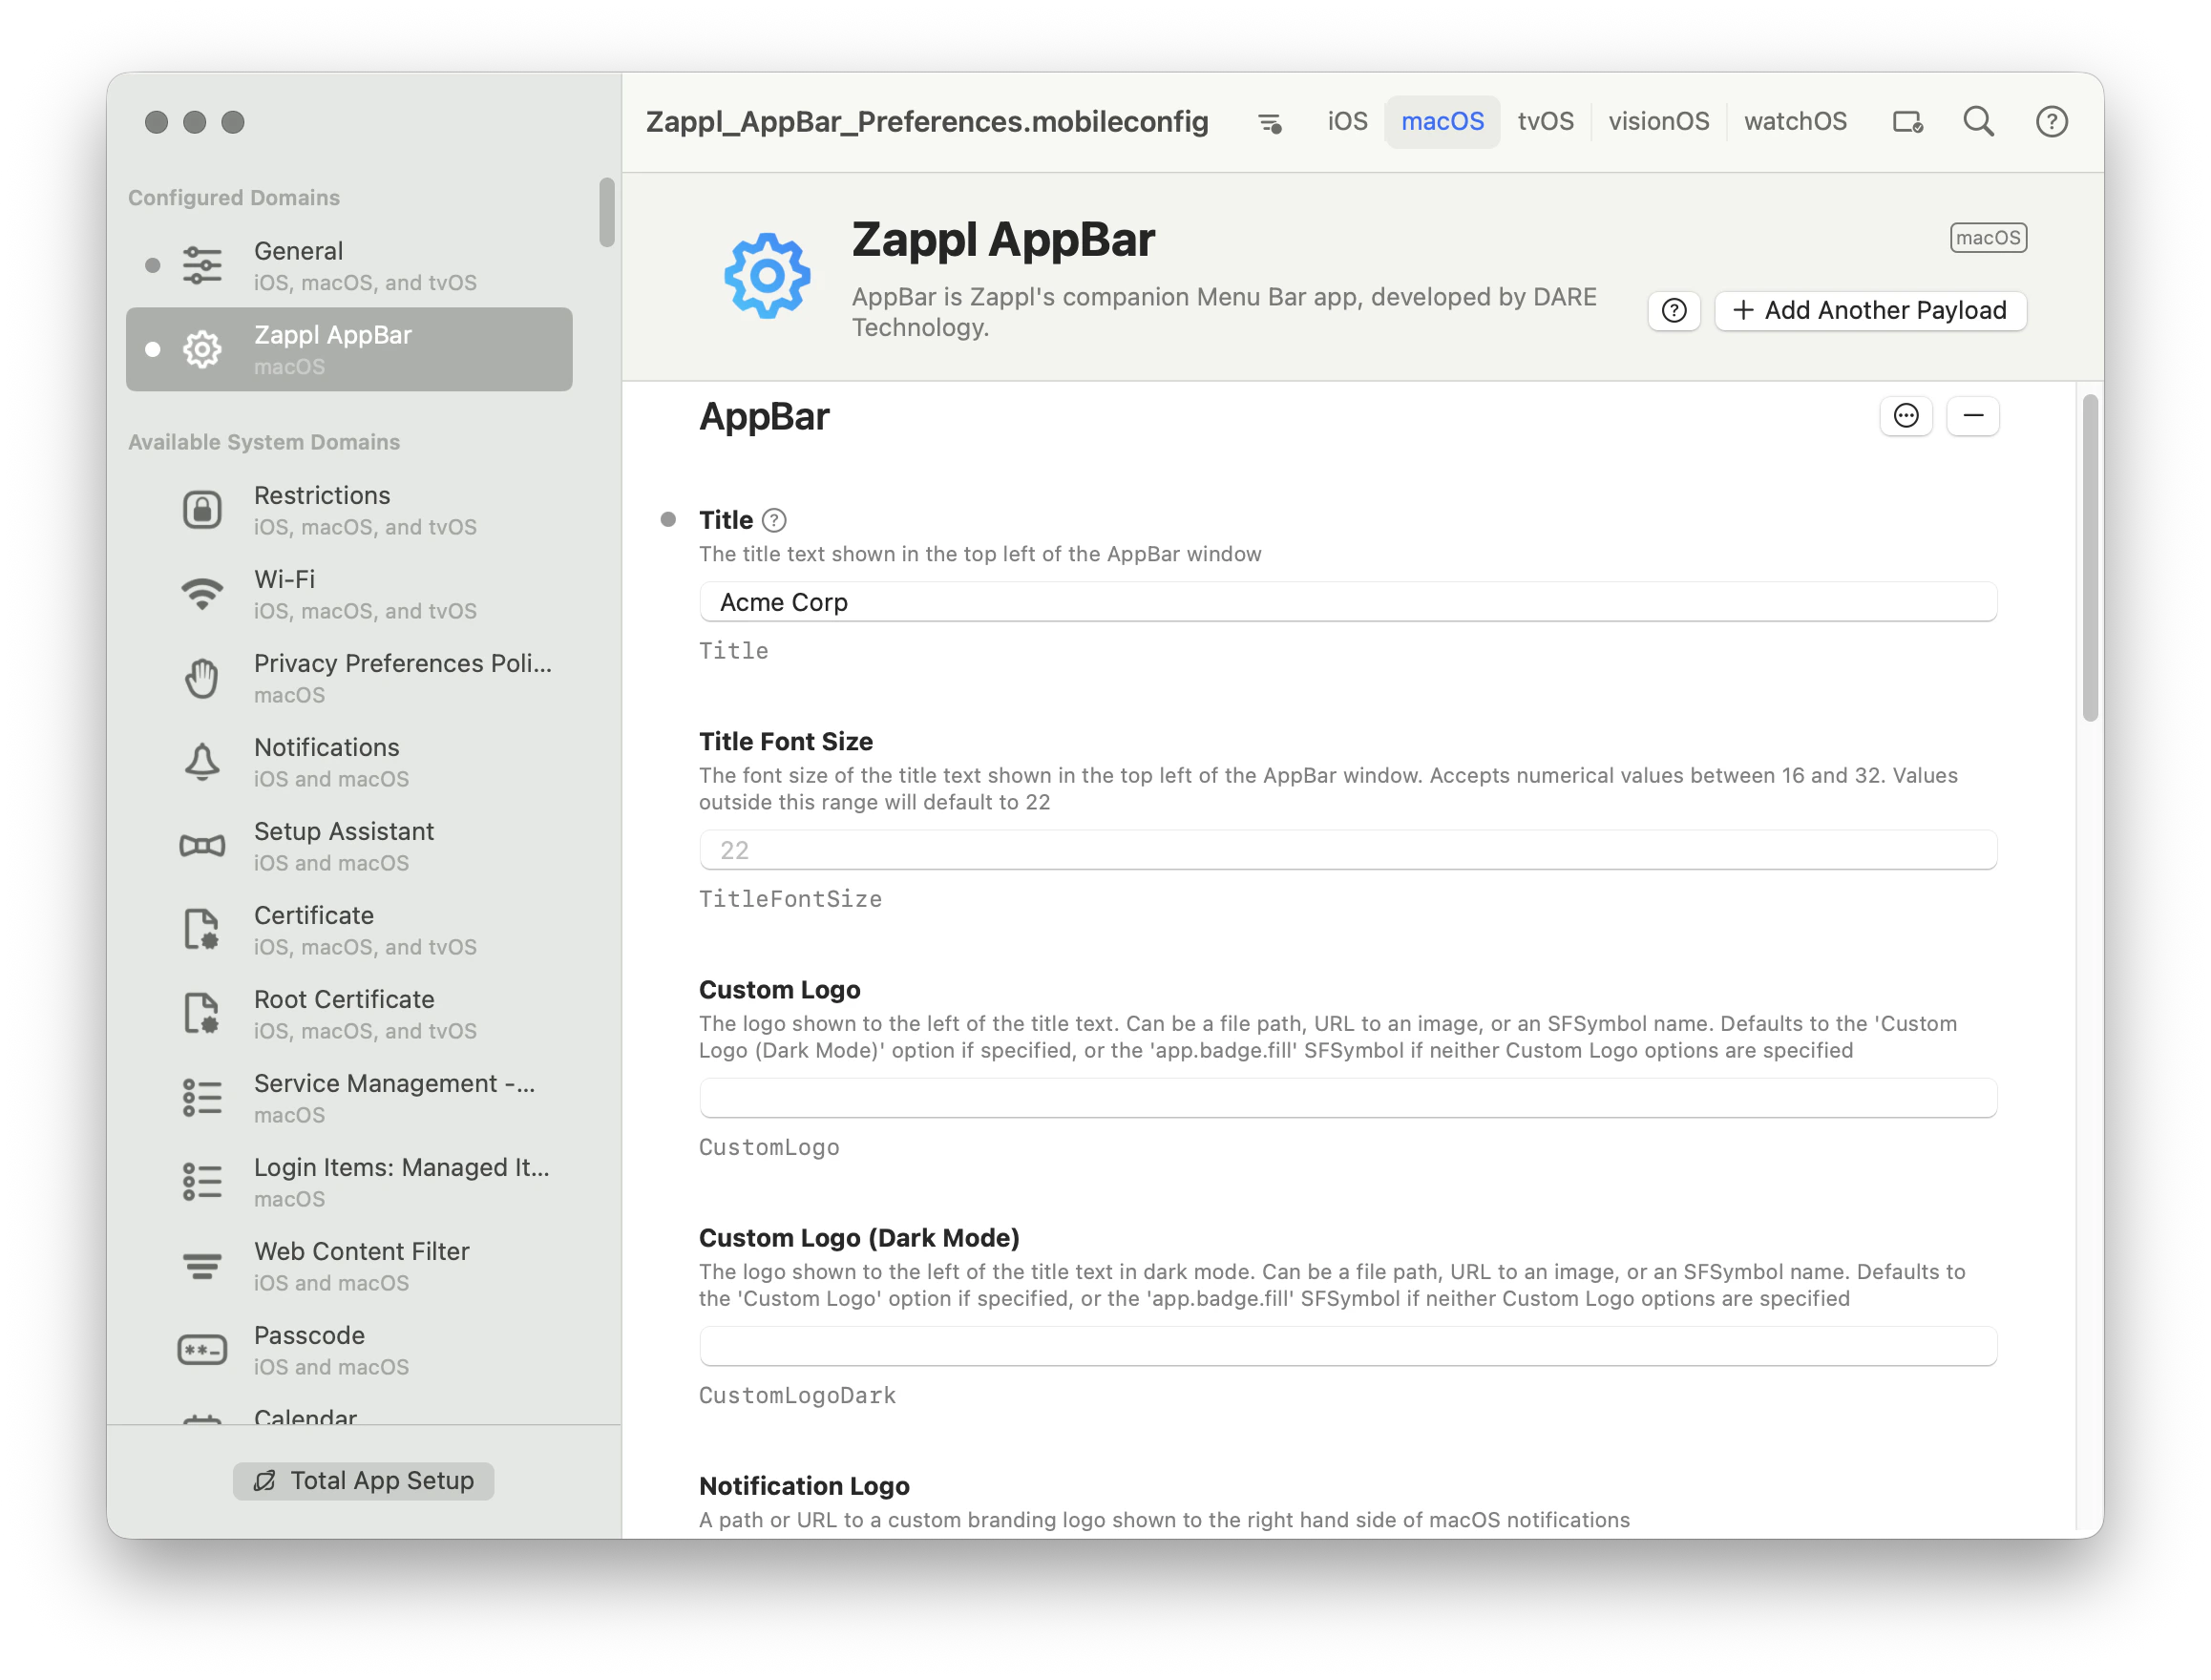 Alter any preferences as required. Refer to our [AppBar preferences documentation](/appbar/appbar-preferences) for information on all available keys.
Name and save the profile. This generates a `.mobileconfig` file ready for deployment via Intune.
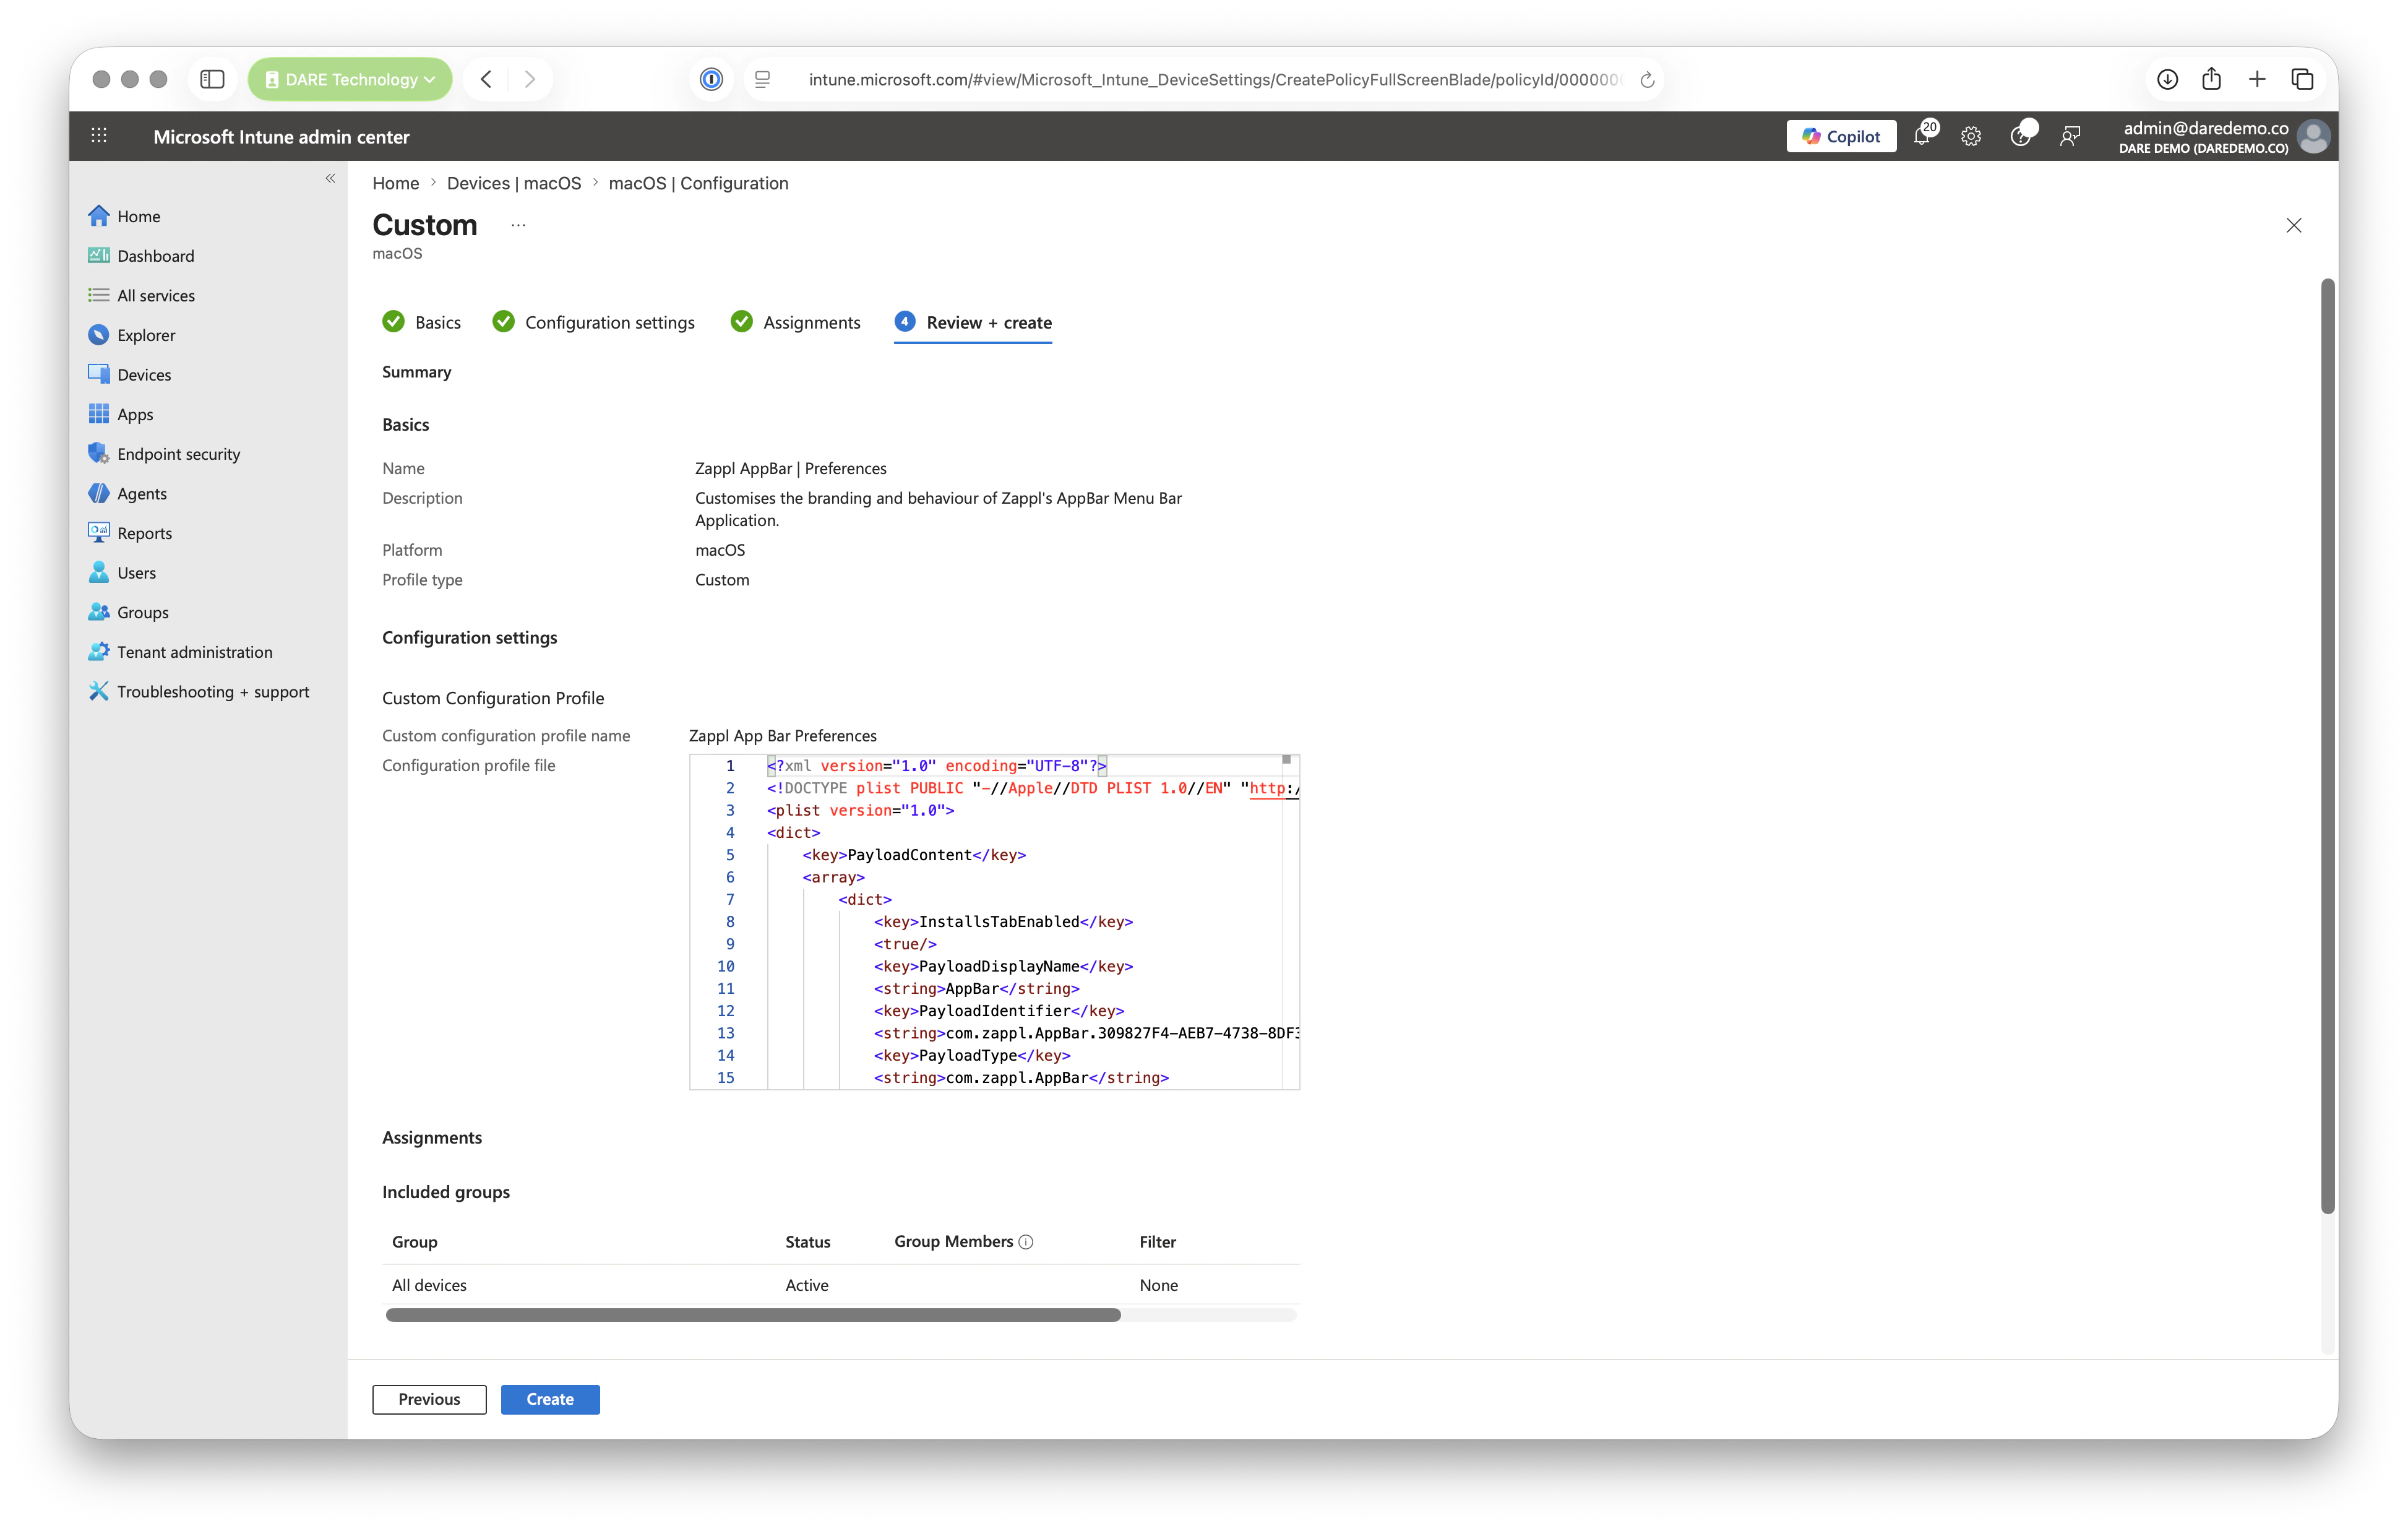
In Intune, navigate to *Devices > macOS > Configuration* and click **Create**, then **New Policy**. Set **macOS** as the platform, **Templates** as the Profile Type, and **Custom** as the Template Name.
Give the profile a name and description, then upload your `.mobileconfig` file under **Configuration Settings**. Add your assignments (e.g. *All devices*), then review and **Create** the policy.
Alter any preferences as required. Refer to our [AppBar preferences documentation](/appbar/appbar-preferences) for information on all available keys.
Name and save the profile. This generates a `.mobileconfig` file ready for deployment via Intune.
In Intune, navigate to *Devices > macOS > Configuration* and click **Create**, then **New Policy**. Set **macOS** as the platform, **Templates** as the Profile Type, and **Custom** as the Template Name.
Give the profile a name and description, then upload your `.mobileconfig` file under **Configuration Settings**. Add your assignments (e.g. *All devices*), then review and **Create** the policy.
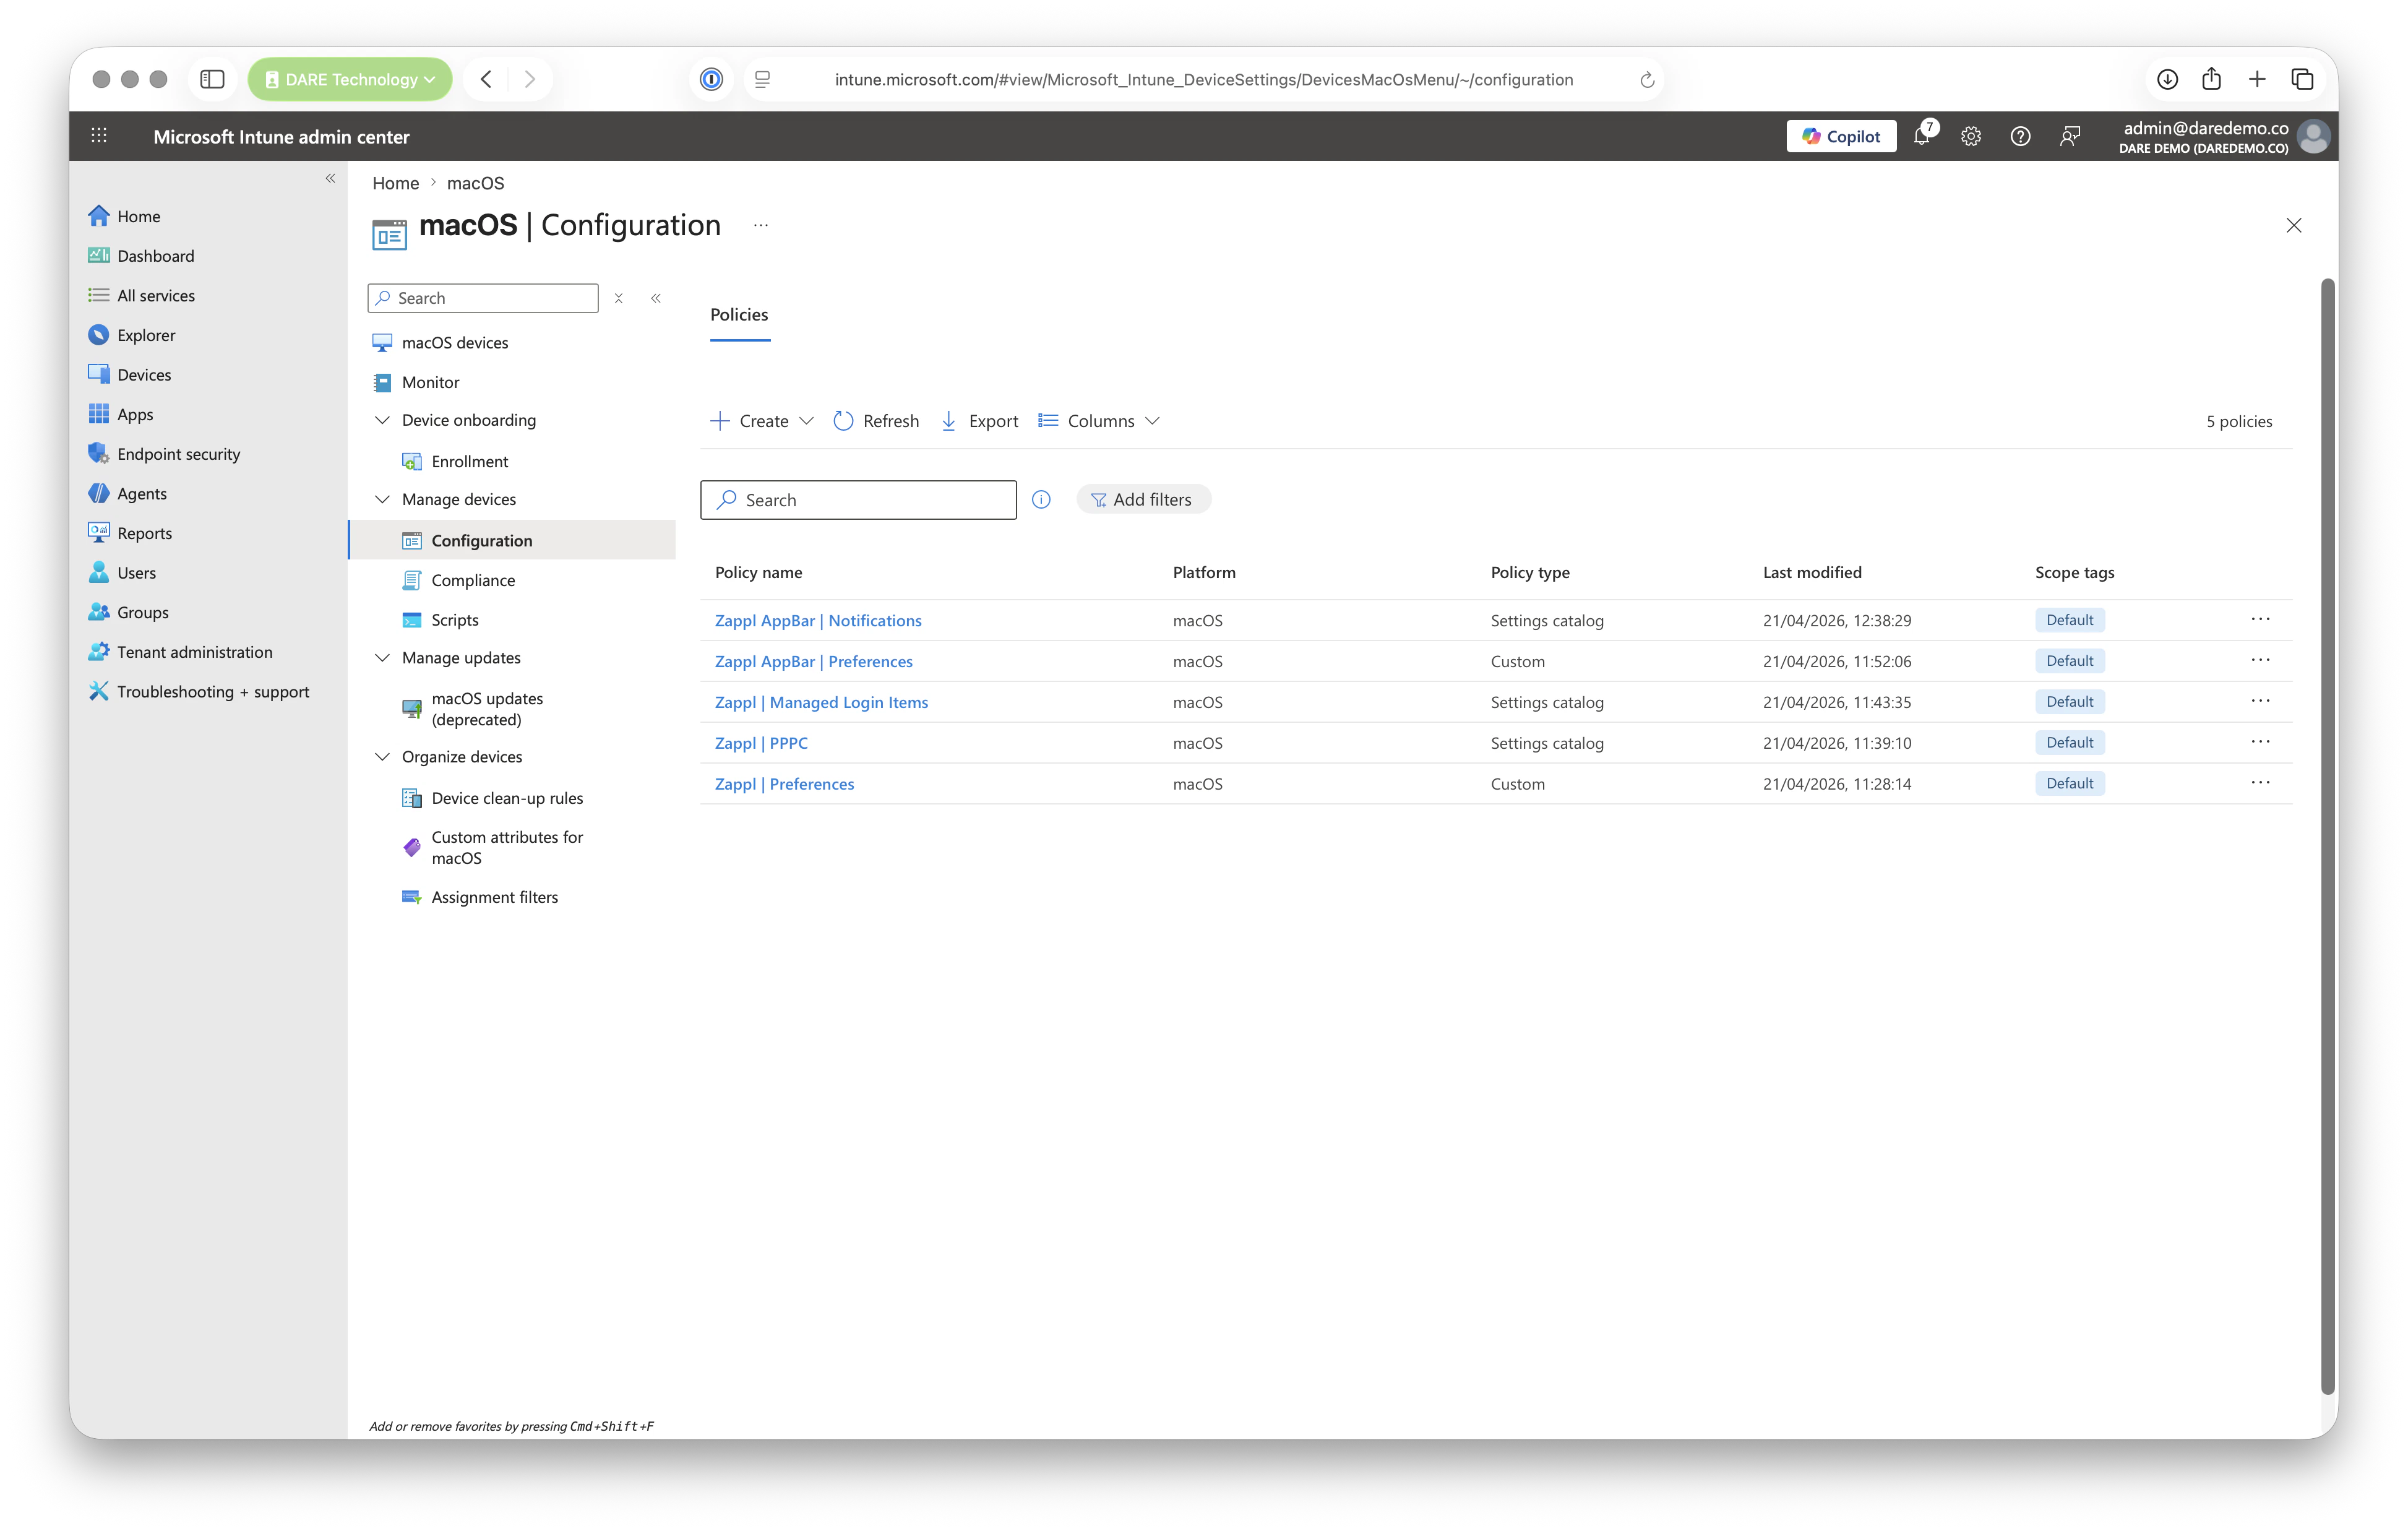
With all policies in place, you should have the following:
* **Zappl Preferences** — Custom Template
* **Full Disk Access** — Imported JSON
* **Managed Login Item** — Imported JSON
* **Notifications** — Imported JSON
* **AppBar Preferences** — Custom Template
## Deploying Zappl
### Via Script (Recommended)
Utilising our deployment script means that the latest version of Zappl will always be installed - **Because of this, it's our recommended option.**
Download our Zappl deployment script **[here](https://latestinstaller.zappl.co/Resources/Scripts/Install%20Zappl.zsh?v=3.0.0)**.
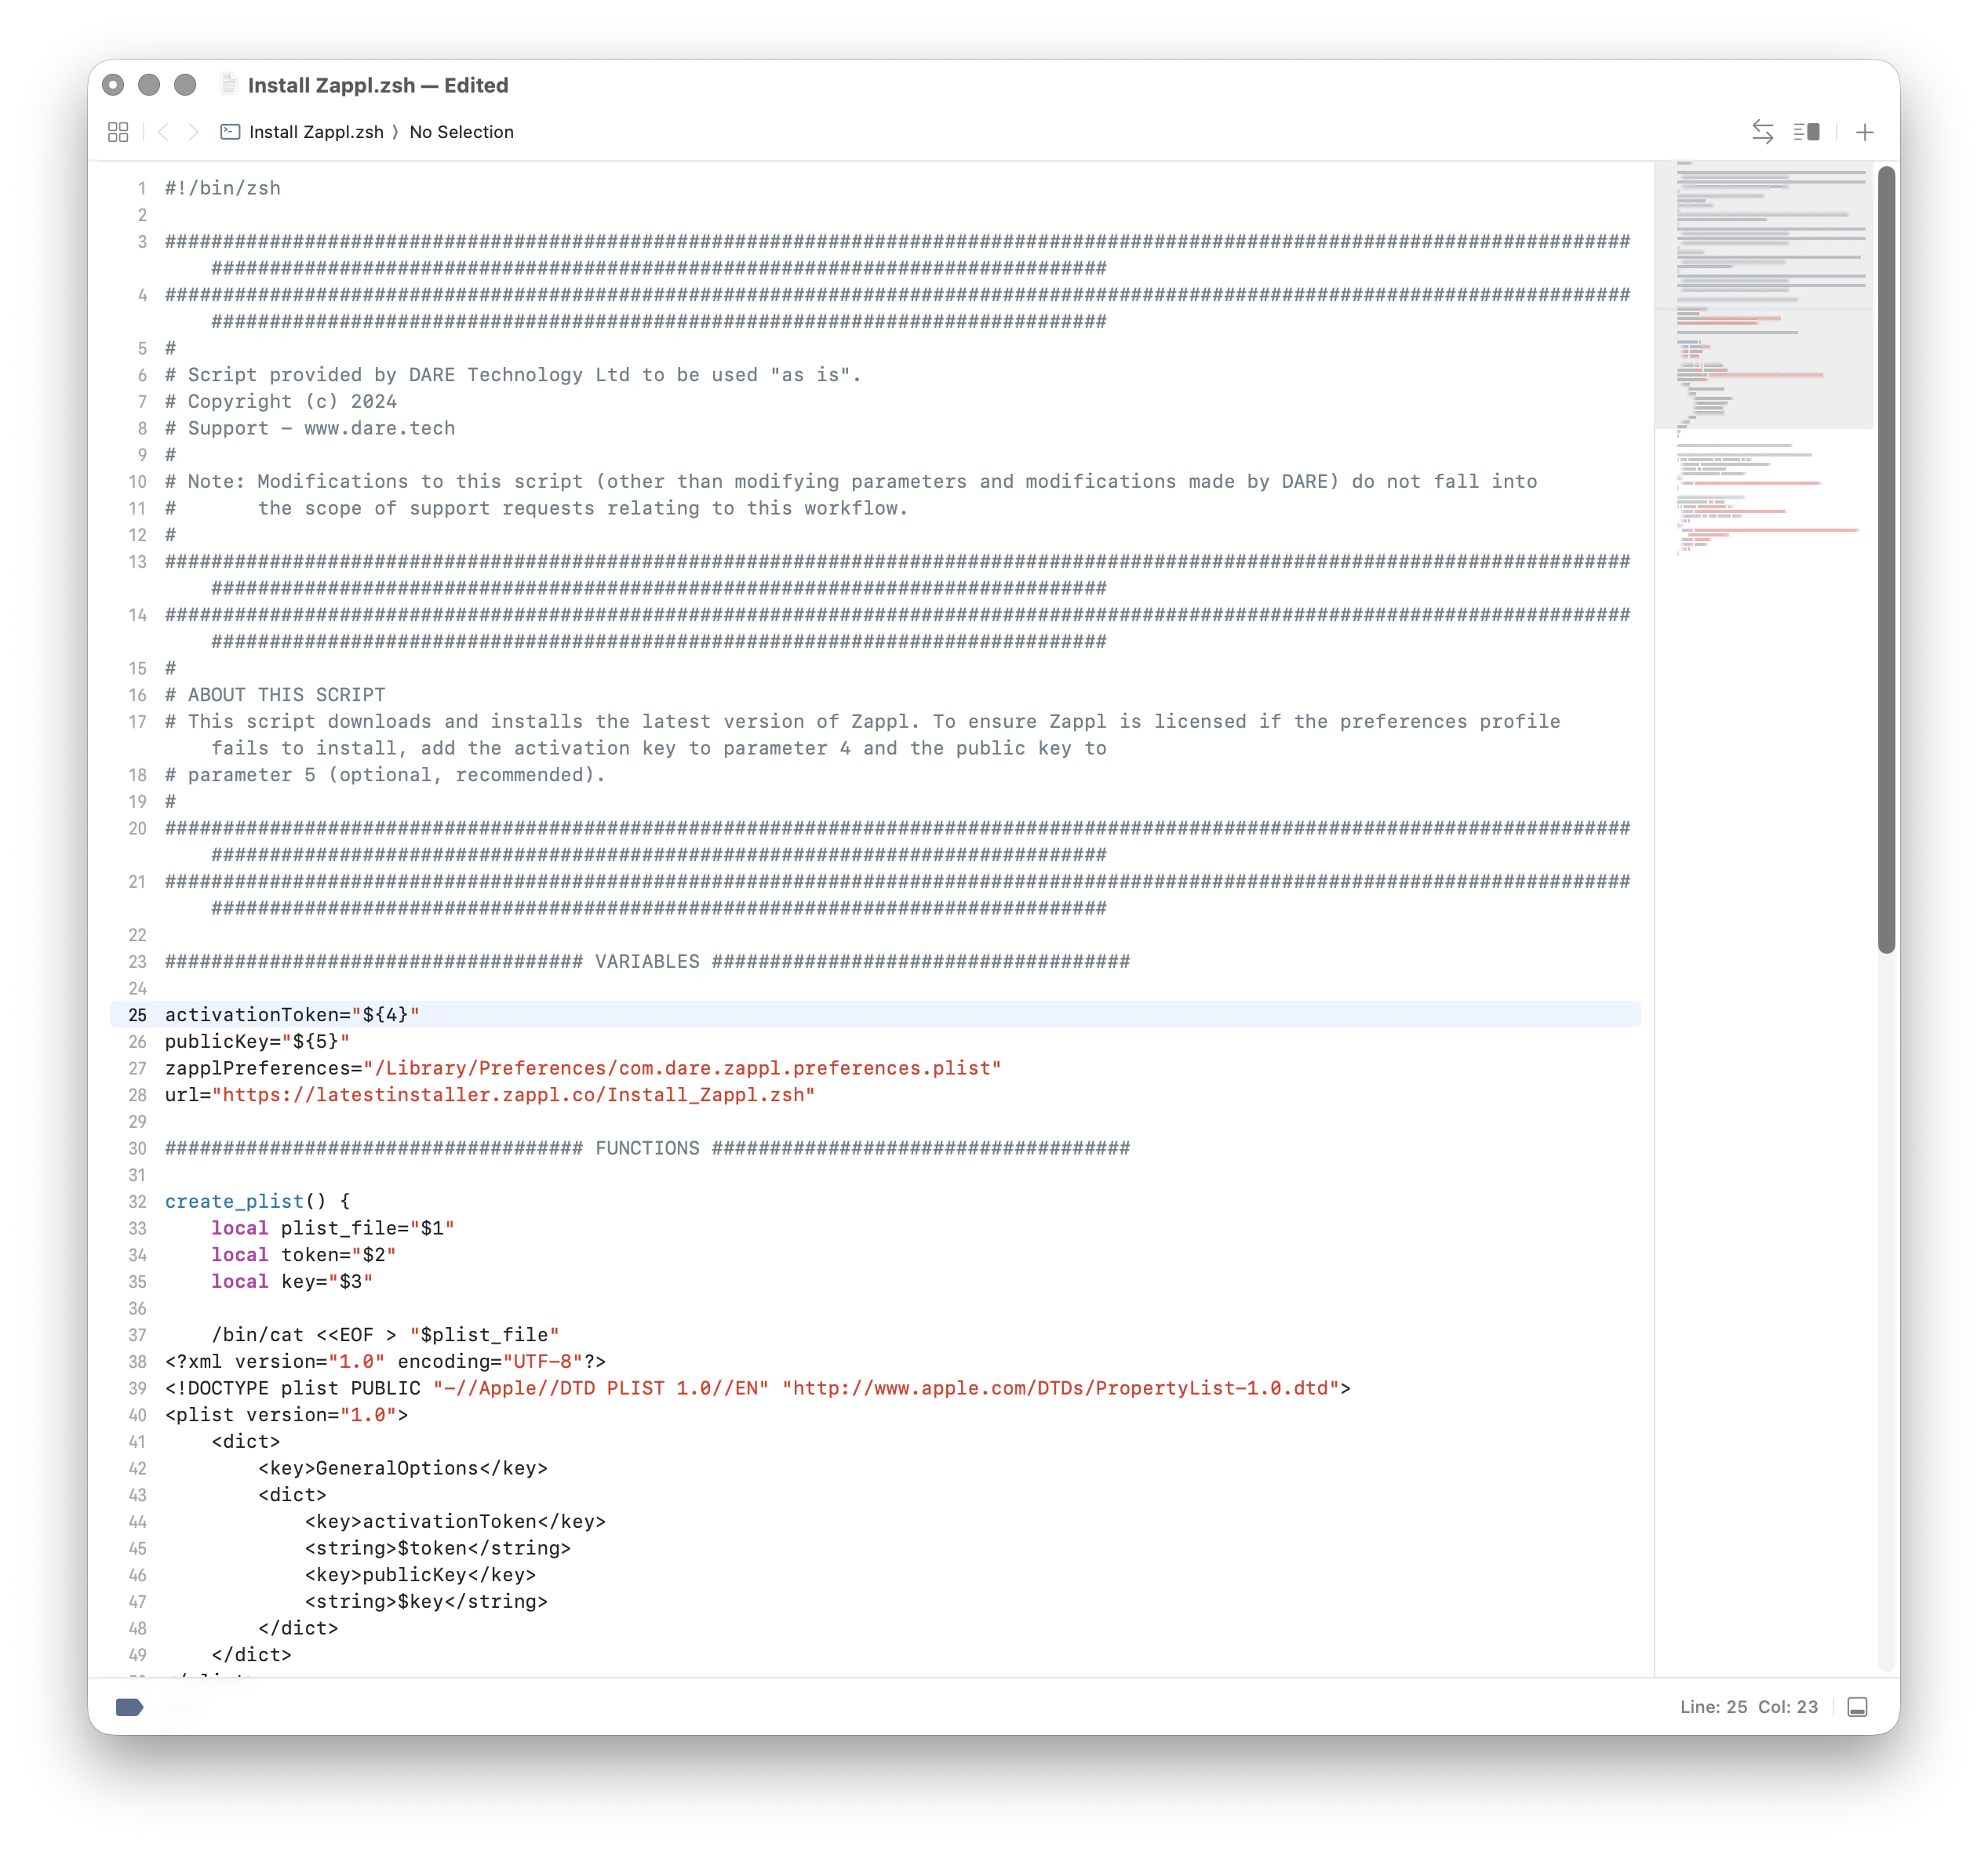
Open the script in your script editor of choice and alter the following variables to match your environment (shown on lines 25 and 26 of the script):
* `activationToken` — Your Zappl Activation Token
* `publicKey` — Your Zappl Public Key
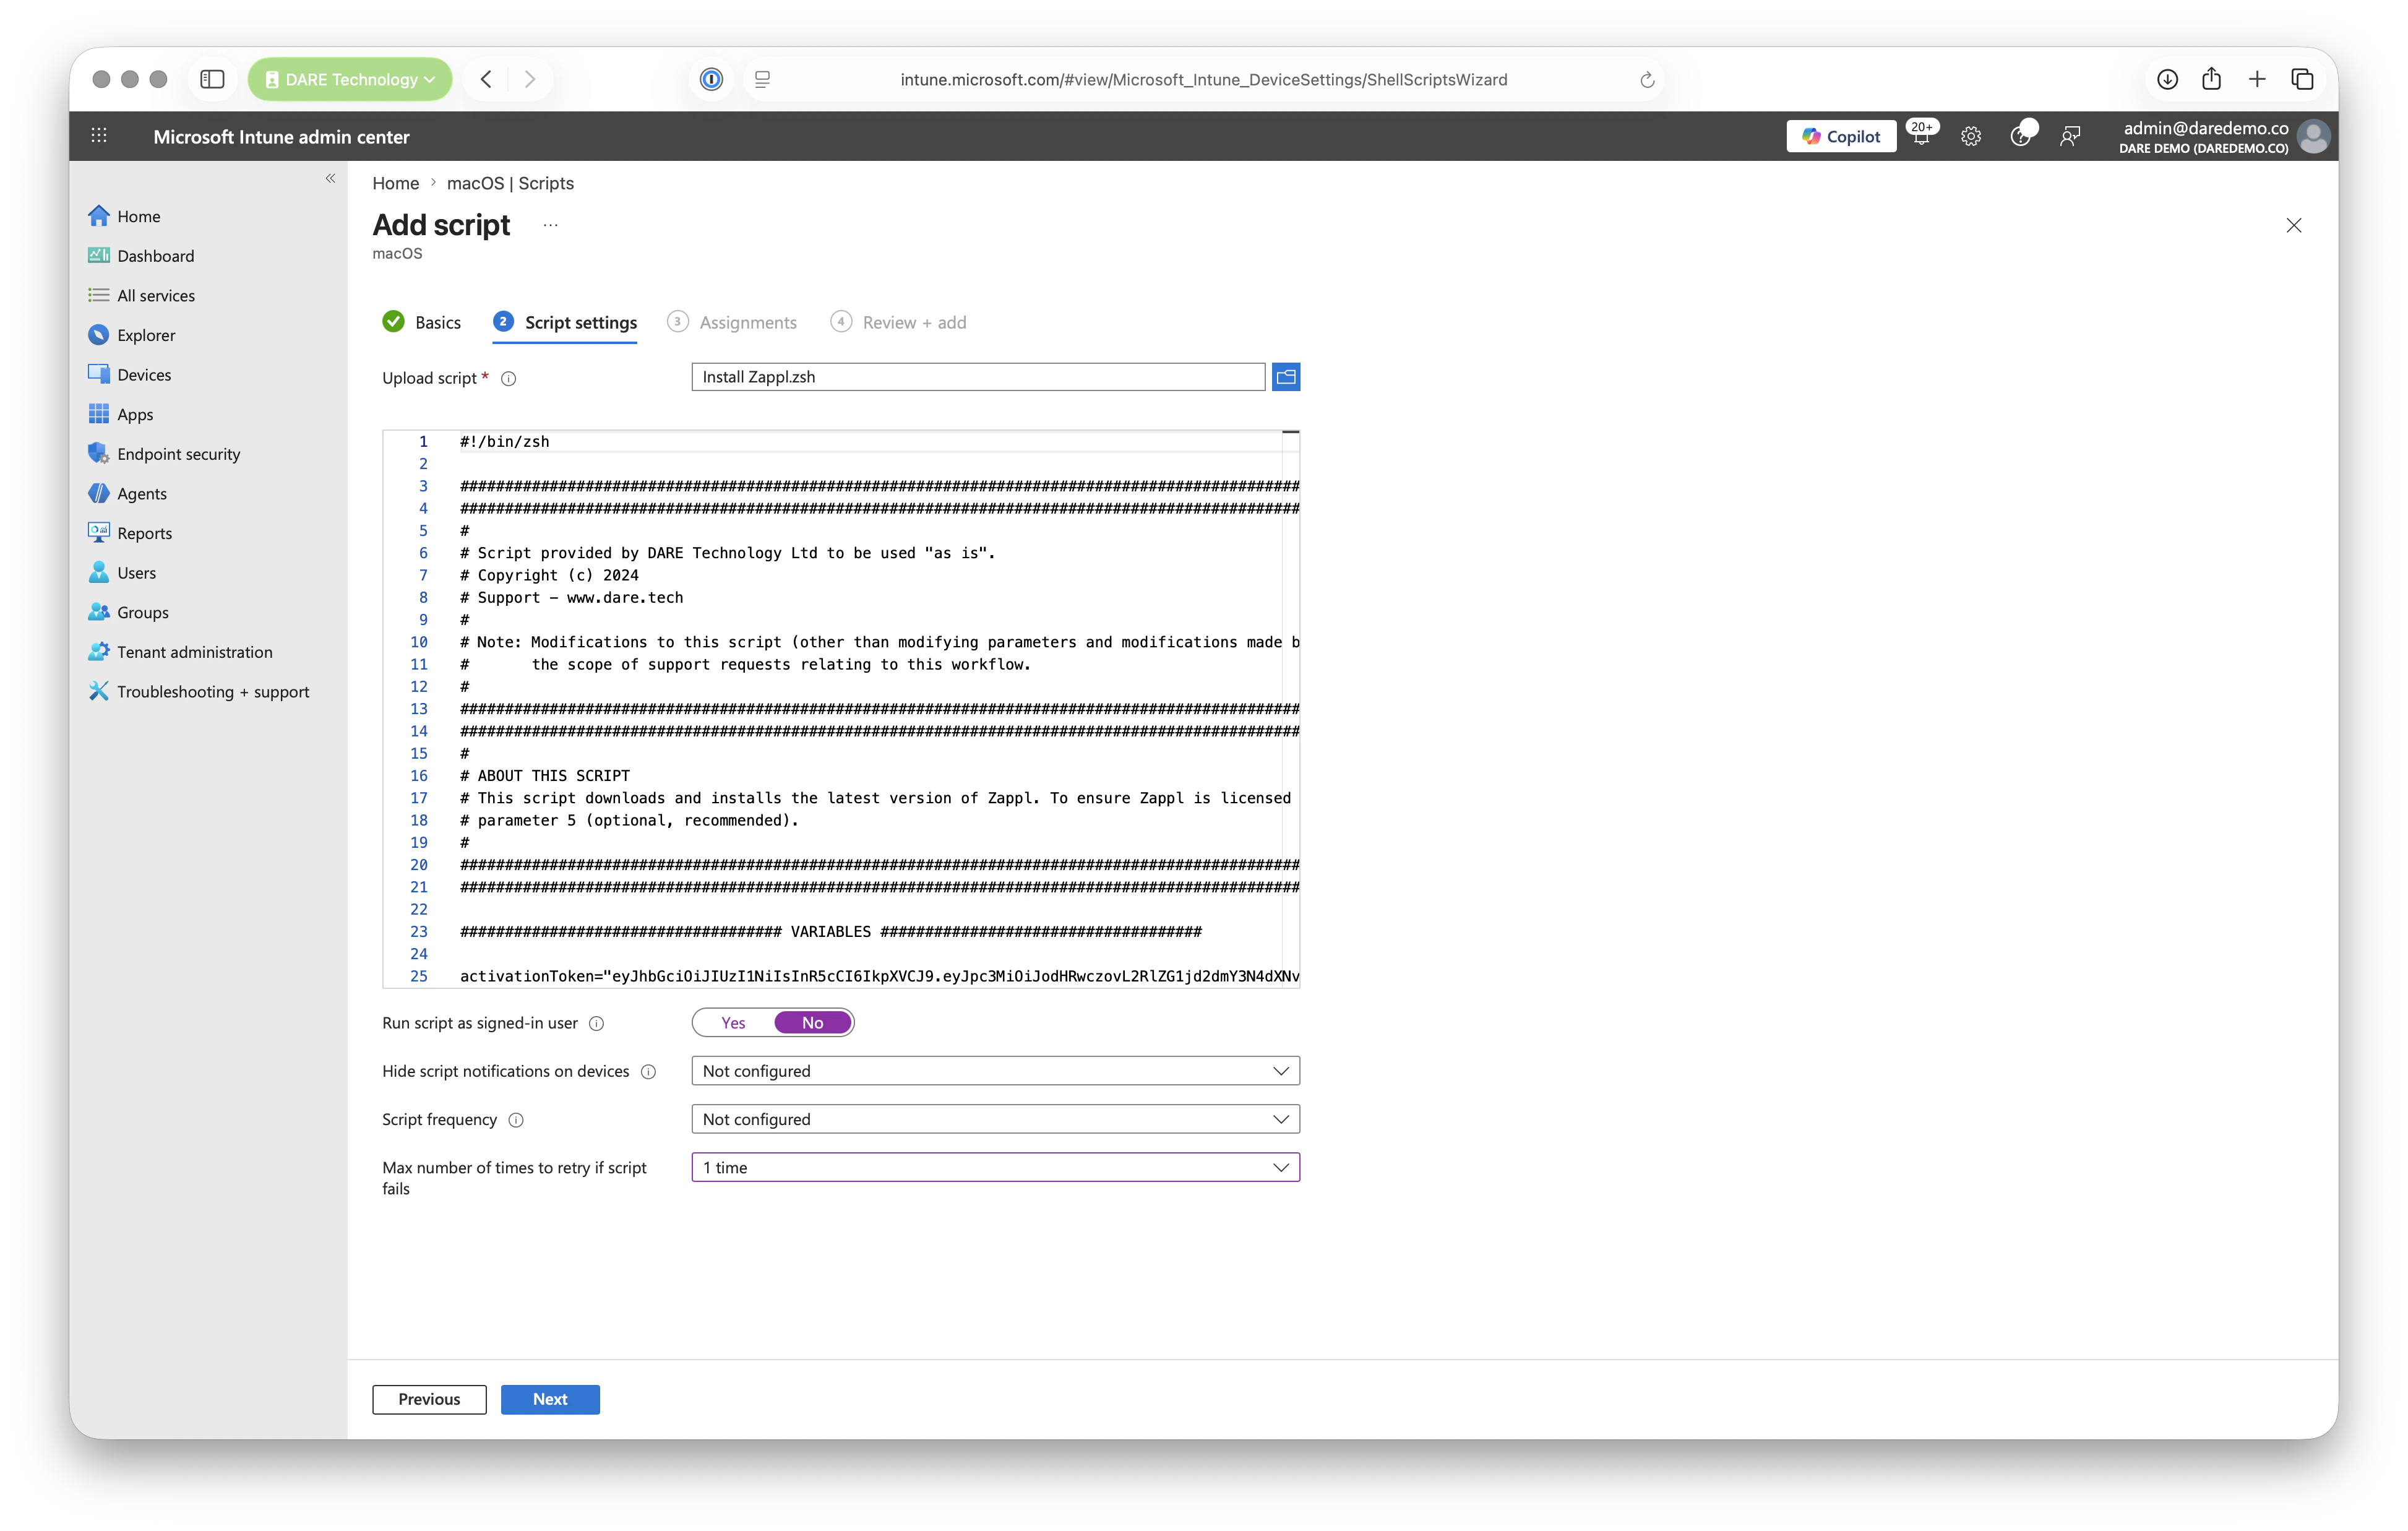
 In Intune, navigate to *Manage Devices > Scripts* and **Add** a new script. Provide a script name and description, and ensure you choose to **not** run the script as the logged-in user.
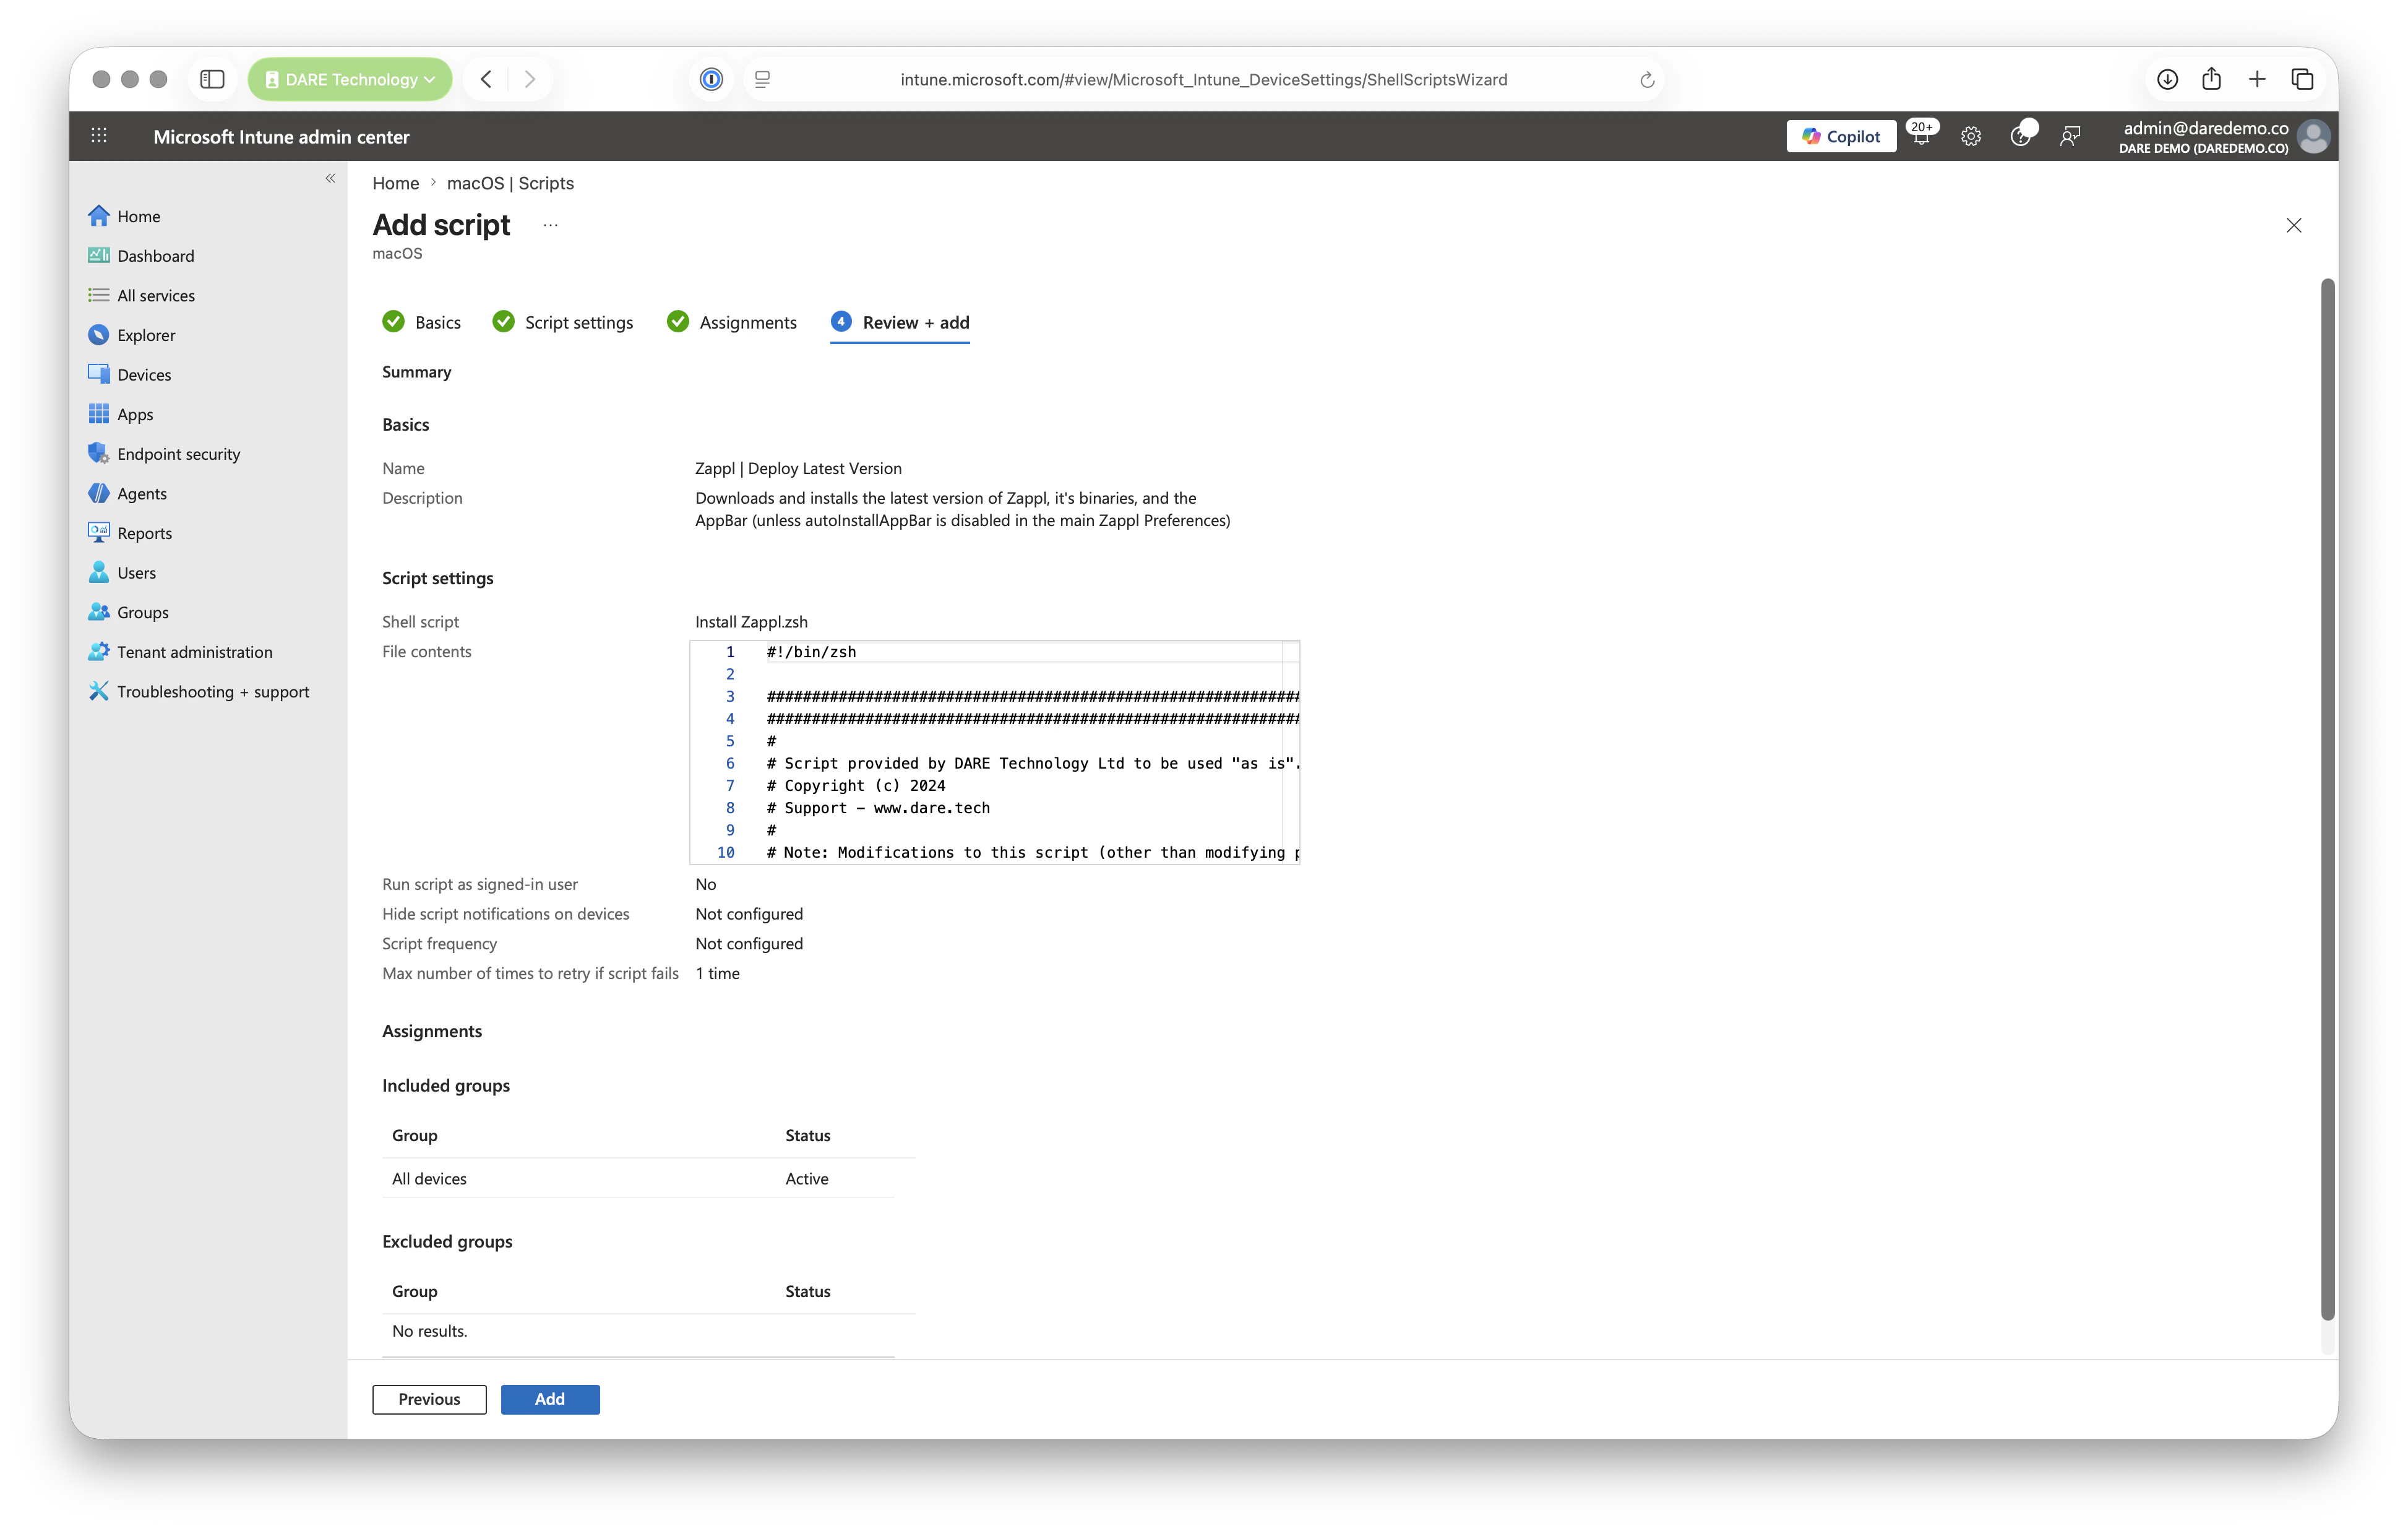
 Assign to the relevant users/groups, then review and **Add**.
 You're all set! With your configuration policies deployed and the Zappl installer pushed to your devices, Zappl is ready to manage and update apps across your Intune-managed fleet.